four instruments to automate Instagram scheduling
Of all the major social networks, Instagram has remained one of the most closed.
- You cannot include links in your subtitles.
- Not that many other features were added, although we now have Instagram Stories.
- For a long time it was not possible to publish third-party apps on the platform.
This last point has been particularly difficult for digital marketers.
The benefits that services like Hootsuite and Buffer brought to managing other social networks weren't carried over to Instagram.
You couldn't plan your content in advance and post it automatically like you could on Twitter or Facebook. That said, if you wanted to post something on Instagram, you had to be there to hit the share button.
Fortunately, Instagram changed that in 2018 by allowing companies to schedule their posts on Instagram through an API.
That makes it easier than ever to take advantage of Instagram's high engagement rates.
An Instagram community is part of a crucial social evidence strategy that you can use to increase your conversions.
This means you may be ready to explore scheduling apps that will help you organize, upload, and preview your Instagram posts.
To help you be successful on Instagram, I'll show you how to use four different tools to automate Instagram content planning.
Let's begin.
4 tools to automate Instagram scheduling
One of the best ways to reach your Instagram audience is by posting engaging content on a regular basis. These tools make this a lot easier: you can schedule posts to go live when your audience is most active.
# 1. Scheduling later for Instagram
The first app I'm going to show you is called Later. It's a social media planning tool that works with Instagram, Pinterest, Facebook, and Twitter.

The best thing about Later is that it's free for up to 30 scheduled posts per month. If you post once a day, this is really good news.
However, you need a premium plan if you want to use videos. So keep that in mind.
Later, Later has two main benefits.
The first benefit is that you can preview your posts so you can see how they will look as part of the bigger picture – your entire Instagram account.
This is very helpful for marketers who want to have a harmonious Instagram page.
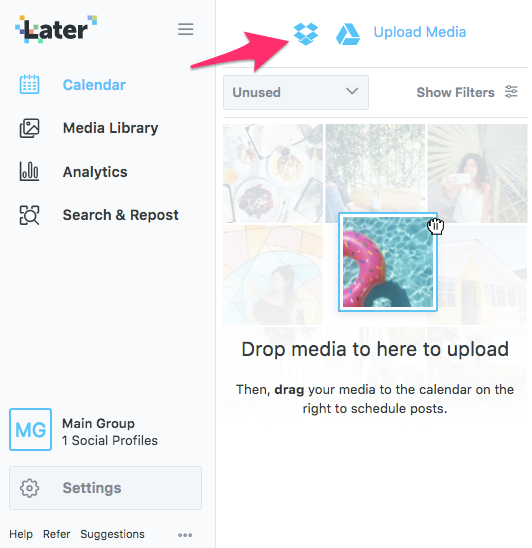
The second benefit is that you can sync your pictures straight from services like Dropbox and Google Drive.
That means you have to skip the annoying step of saving your pictures to your camera roll on your iPhone before posting them on Instagram.
Let me show you how it works.
You'll need to create an account to get started. Once you've entered your Instagram information and selected a name and time zone, you'll be taken to the main dashboard.
It looks like this:
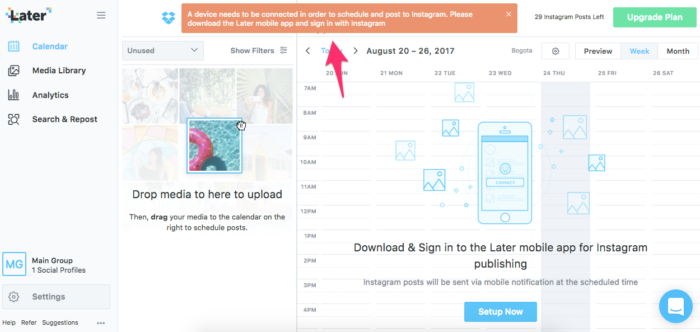
To schedule posts for later, you'll need to download and sign in to the Later mobile app.
Once your mobile app is connected, your dashboard will look like this.
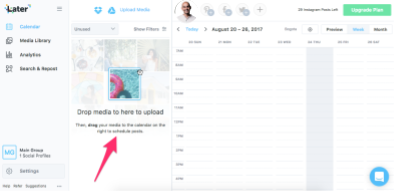
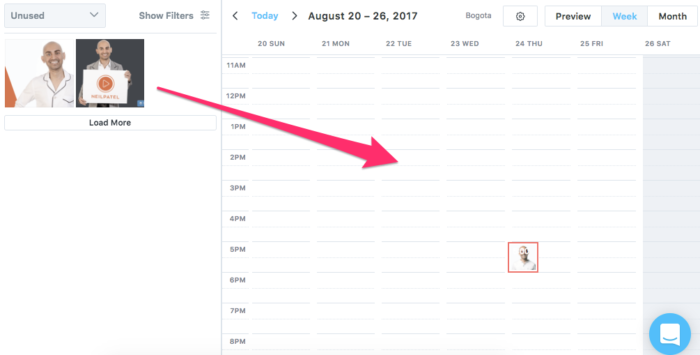
To start using it later, you need to add media. You can either drag and drop pictures into the media library or connect to Google Drive or Dropbox.
Later is great because you can quickly organize so much content in two different ways.
First of all, you can choose the option to view only the content that you have not published or the content that you have starred.
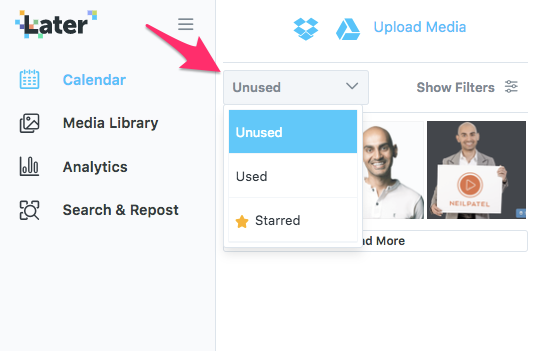
The more detailed option is to add captions to your images, which you can then filter to show only certain types of images.
Click the image to add a caption.

Then create your label.
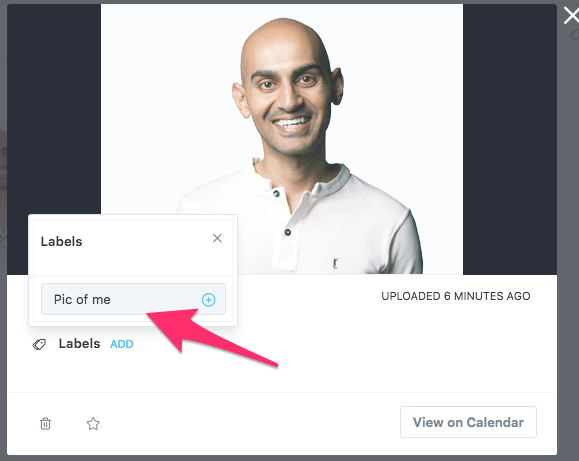
Now you can go back and filter your pictures.

If your media library doesn't have a lot of images, then it's probably not worth labeling them.
However, having thousands of images and taking some time to organize them can save you a lot of scrolling in the long run.
There are several ways you can post a post later.
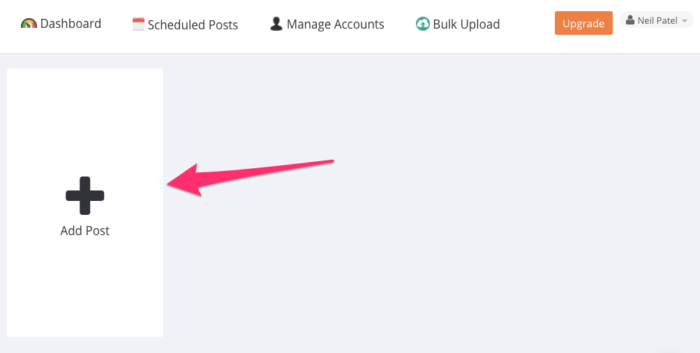
The first is by clicking directly on the image itself.
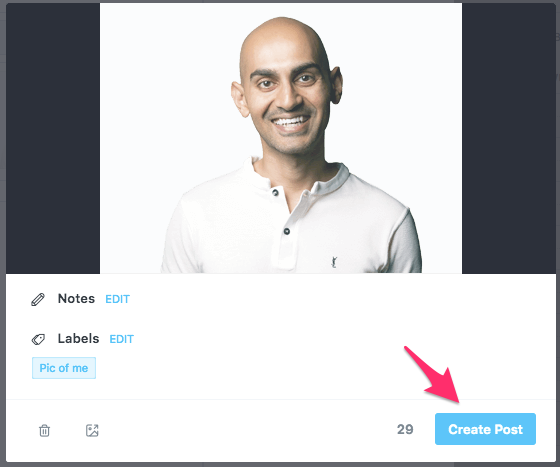
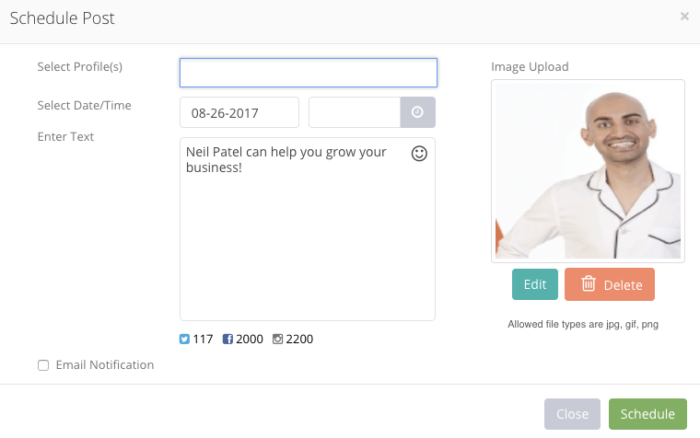
The window for creating posts opens. You can edit your harvest and add a caption for the post.
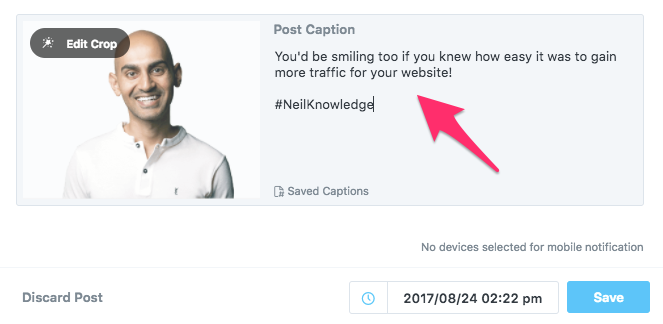
Then select the desired date and time at the bottom of the window.
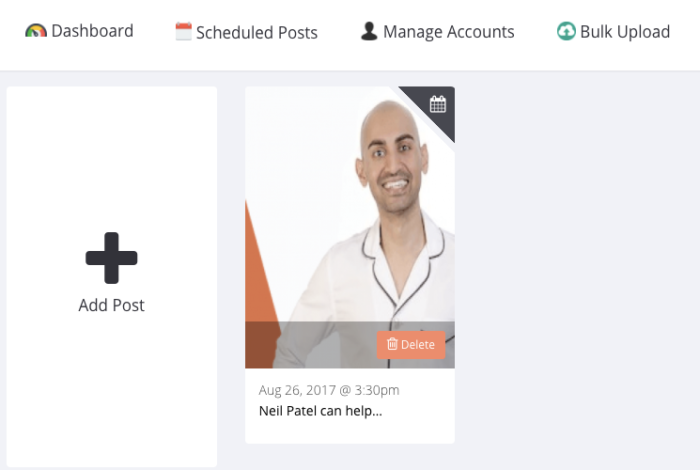
The planned post is now in your calendar.
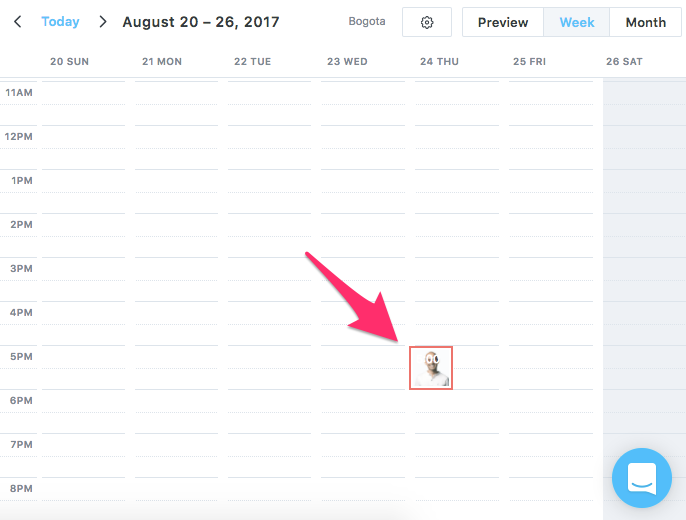
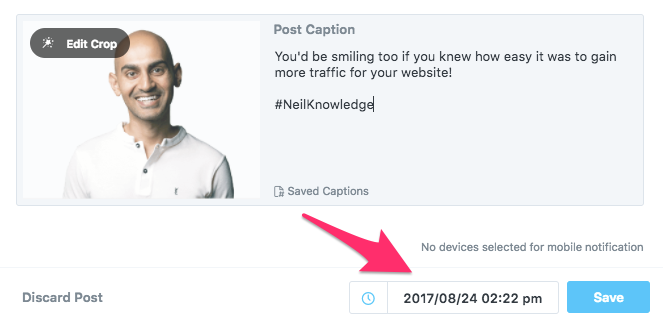
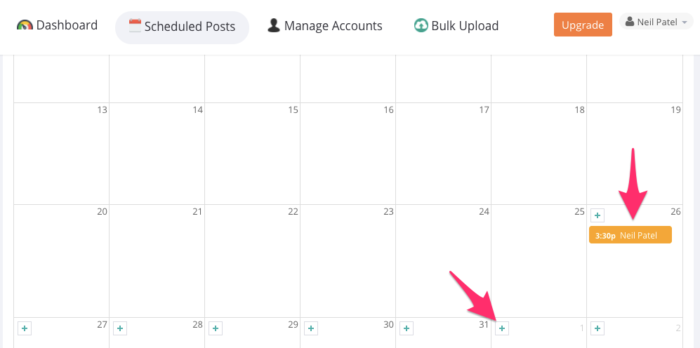
You can also simply drag and drop the content into the calendar on the slot for the desired time and date.
When you do this, the popup will automatically open in which you can write the caption. The date and time are already added below.
When it's time to publish your content, your content will be published automatically.
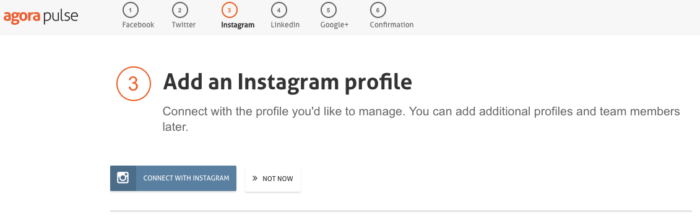
# 2. Agorapulse for Instagram scheduling
Agorapulse promises to centralize your social planning in one place. There is an option with a free trial to see if it is right for you.
As later, it provides a schedule for the major social networks. I'll focus on the Instagram planning for this article.
Click the Start Free Trial button above.
There is one caveat, however. You need to connect with your Facebook account. You can't just create an account with your email address.
It then goes through various authentication steps before Agorapulse asks you which accounts and sites you want to connect to. You can skip the Facebook and Twitter step and just create the Instagram account.
When you're signed in, the first thing you'll see is your inbox. Your inbox is a collection of all the comments from your Instagram posts.
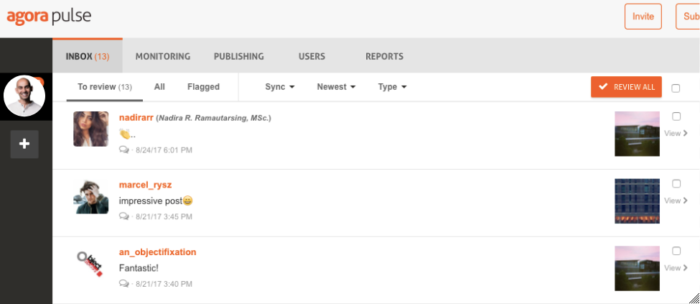
This is a great way to connect with people who've dealt with you. This is especially useful for a community manager.
This article is about publishing. So click the Publish tab.
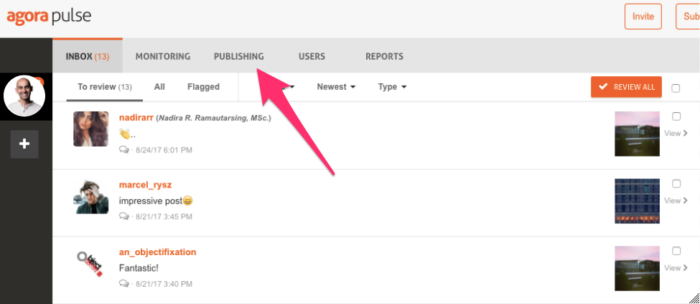
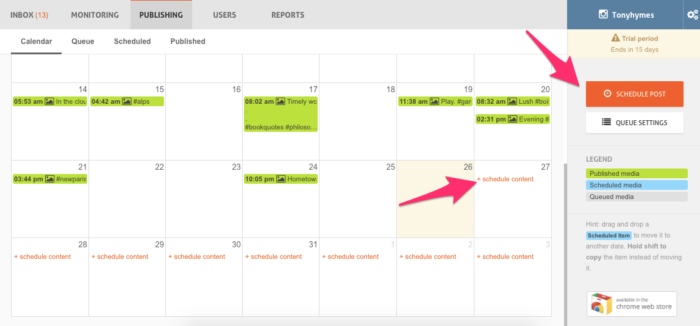
The Publish tab displays a calendar view that shows when you've already posted. For days in the future, you have the option to click the calendar date to schedule a post.
You can also click the Schedule Post button in the menu on the right.
Use the pop-up window to create your contribution. You can upload media directly from this field.
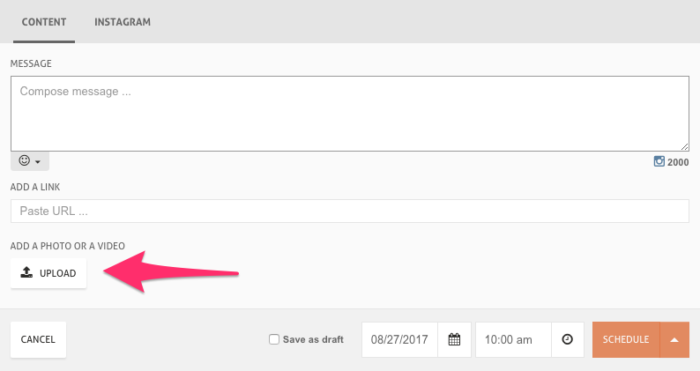
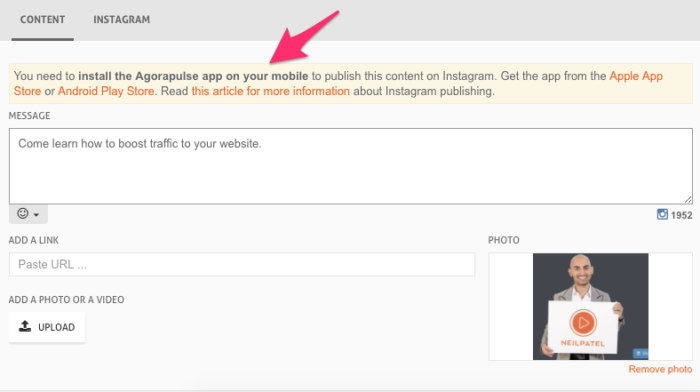
Once you've uploaded your media, you'll be prompted to download and install the Agorapulse mobile app, which works more or less exactly like the Later app I showed you above.
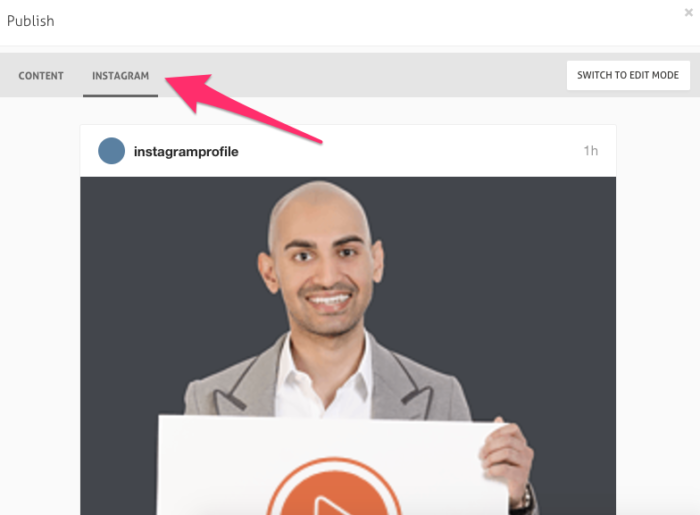
One cool feature of Agorapulse is the Instagram view, which lets you preview what your post will look like right from the post creation popup.
Once you've installed the app, you can add your post to your queue.
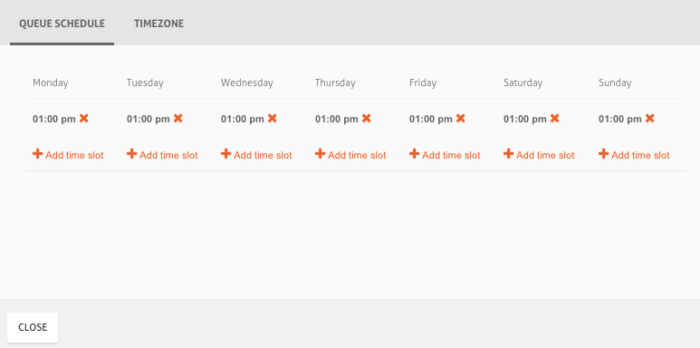
Another cool feature is the time slot option for your queues.
Do you know how to see your insights on Instagram?
If you scroll down you can see when your audience is most active each day of the week.
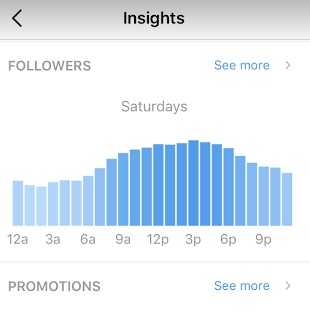
You can then set up a standard time window for each day of the week in Agorapulse. That way, when you add your posts to your queue, it will automatically assign the best time for that day.
Agorapulse is also advanced in terms of reporting and identifying your top followers. You can see at a glance who is interacting with you the most and who your most influential followers are.
# 3. Autographers for Instagram scheduling
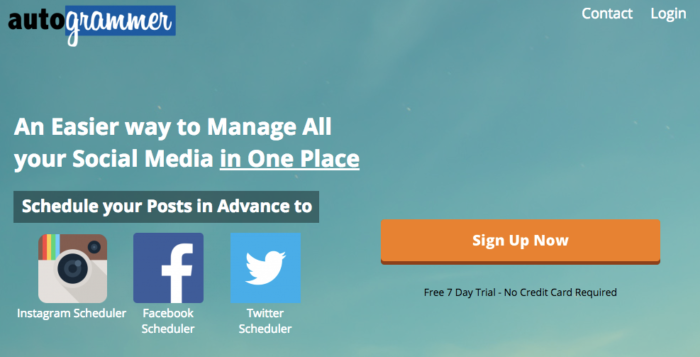
Another platform that promises to centralize the planning of your social networks is Autogrammer, which offers a free seven-day trial.
Getting started with Autogrammer is much faster than with Agorapulse. Once logged in, you can add your social network accounts using the menu on the right or the green button in the middle.

To add an account, enter the details in the pop-up.
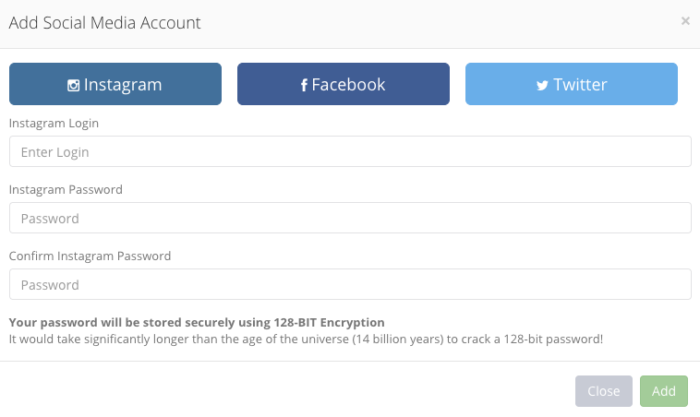
When your Instagram account is connected, you will be asked to add a post.
Just like the other services I've described, you can upload a picture directly, add a caption, choose a time, and add multiple social networks if you want to post to Instagram and Facebook at the same time.
The post will appear in your queue.
The user interface is designed as simple as possible. However, you can still access Calendar View by clicking the Scheduled Posts option at the top.
As with the other services, you can add a new post directly from the calendar view by clicking the little plus button of each date.
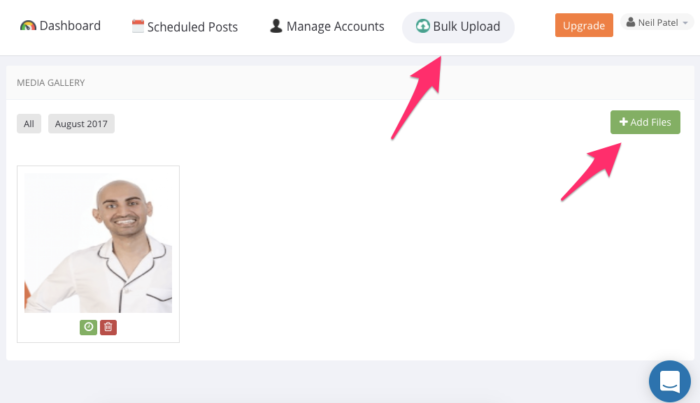
Finally, there is a bulk upload option if you want to add multiple media files at once.
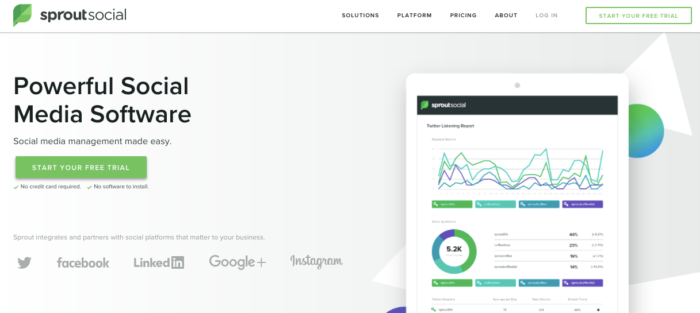
# 4. Sprout Social for Instagram scheduling
For a more robust option in terms of functionality, Sprout Social could be a go for you.
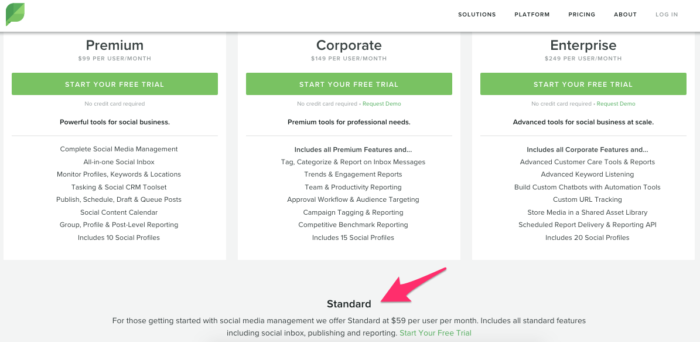
As with the other platforms, there is a free trial that you can get started with. Here you can rate whether the user interface and the functions meet your requirements.
The free trial is very important to Sprout as the plans can get very expensive. It is positioned more as a corporate service.
You might want to consider this before getting addicted.
I want to point out that there is a standard service that costs $ 59 a month if you're just getting started, rather than the basic plan that starts at $ 99 a month.
You can find this option hidden under the other major plans.
You can start your free trial using one of the following options.
After you've entered your email address, you can link your social accounts.
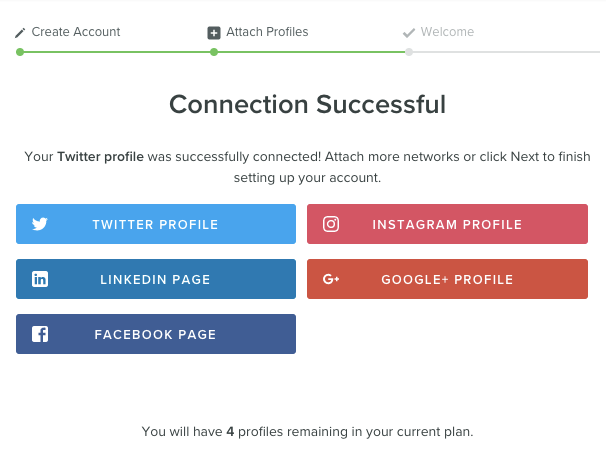
The more expensive plans allow you to add more social profiles. The standard plan allows you to add five.
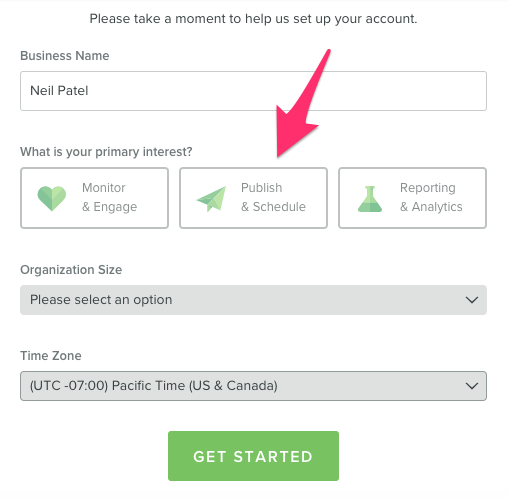
The next screen in the setup window. It'll ask a little more about your business as Sprout is more geared towards business and corporate customers.
Since we're into planning on Instagram, hit the "Publish and Schedule" option.
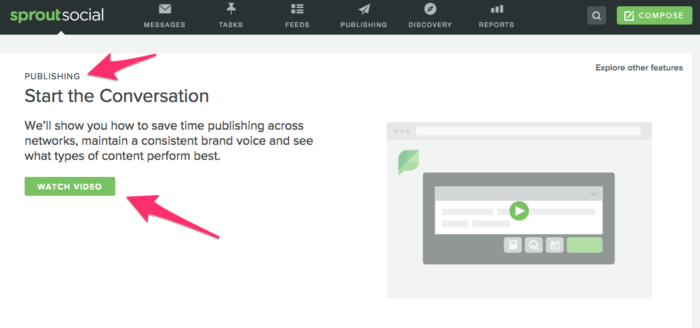
You will still have access to the other features of the platform, but Sprout will guide you straight away using the publishing features and a video that explains how to publish and schedule. It's a nice gesture.
You are always just a click away to post on Sprout. The green Compose button is in the top right. The pop-up window is similar to the other services I've already shown you.
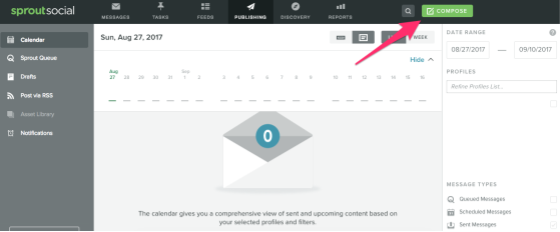
The Publish tab displays a calendar view listing your scheduled posts. You can adjust the date range on the right to show more or less time.
When it comes to Instagram scheduling, the mechanism is similar to the other services I've already described. You download the app and connect your Instagram.
Then you need to follow the steps to share the content on Instagram through the Instagram app.
Sprout goes further than the other platforms I've described in both its project management functions and its focus on helping you grow your accounts.
Take the Tasks tab, for example.
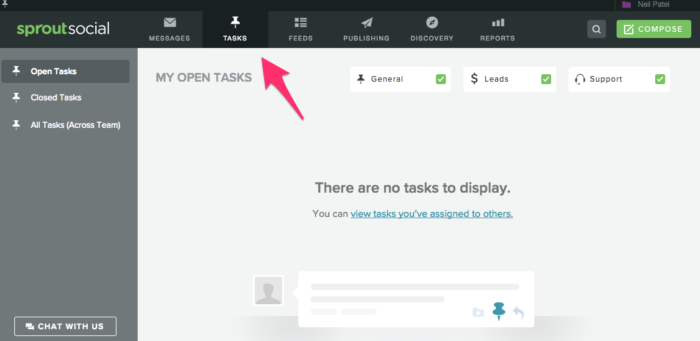
As people interact with your Instagram account, you can manage your messages from the Messages tab. When you add a task to a message, such as For example, reply to or contact this person, your task will appear on the Tasks tab.
This is useful when working in teams where a community manager can centralize the answers they need by walking through and telling who does what.
You can also mark someone as a potential lead and make sure you are following them in a way that is more sales-oriented than simply replying to a comment on an Instagram post.
The other cool feature of Sprout is the Discovery tab. The discovery feature lets you create custom hashtag searches to find people to interact with.
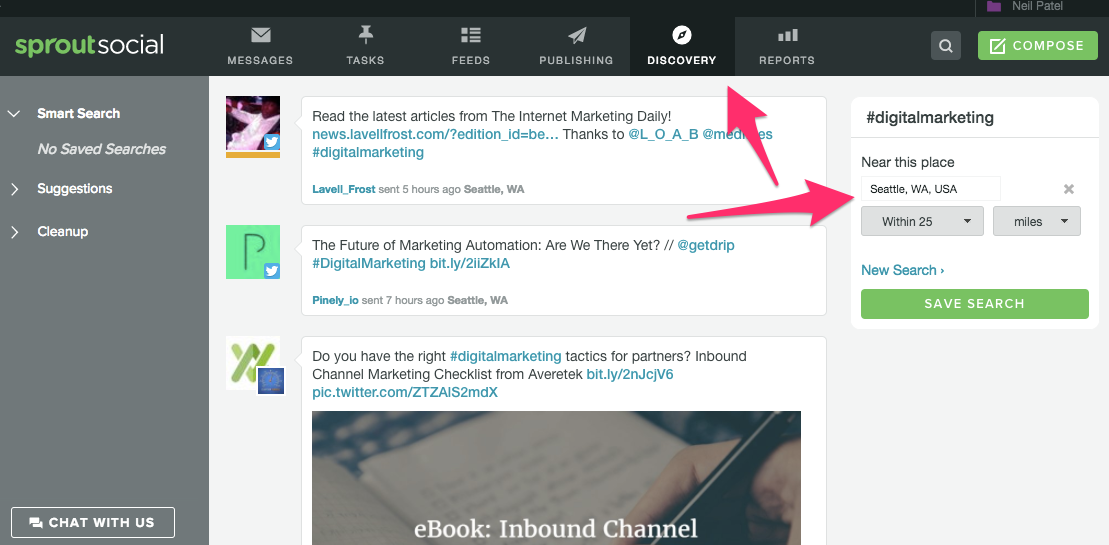
You can also use a geofilter to narrow your search to a specific geographic area.
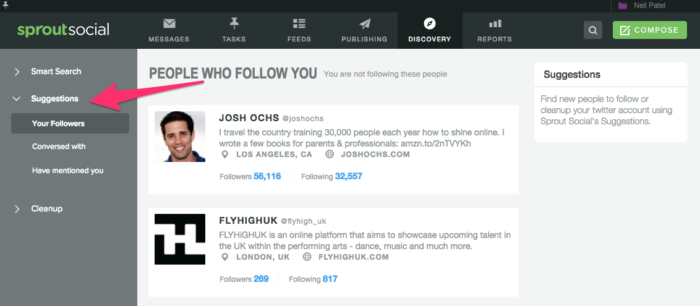
Clicking Suggestions in the menu on the left side of the screen will help you find more people you follow or who have interacted with you.
This is especially useful if you manage a large community and want to find new key people who will help you closer to getting your business started since they already know you.
Conclusion
Finally, Instagram makes it possible to automatically post to their account – at least if you have a company profile.
Now it's easier than ever to schedule Instagram posts at the best times during the day and week to get the maximum number of your followers.
Use an Instagram planning tool to properly execute your Instagram strategy and avoid common mistakes.
Each platform offers different advantages and, above all, different interfaces.
Some interfaces are of course more convenient for you. The only way to know is to test.
Once you find the right one, you can start implementing a successful Instagram strategy.
Which apps do you use to schedule posts on Instagram?