Web site Design: The Full Information
Disclosure: This content is endorsed by the reader. So if you click on some of our links we may receive a commission.
Designing a website from scratch can be a challenge. This need not be.
Years ago when I started building my websites there weren't many resources. Basically there were two options: learning the basics of website programming languages or hiring a designer. The first choice is difficult and time consuming. The latter is expensive.
After a brief attempt at designing everything myself, I spent the highest dollar on a designer. It was more than I wanted to spend, but I didn't really have much choice.
Today, new website owners have more resources. It is possible to design a professional website without hiring a designer or learning to code.
Sounds too good to be true? It is not. Whether you are a complete beginner or just looking for an alternative way to design websites, you've come to the right place. This step-by-step guide explains how to design a website.
My favorite tool for website design
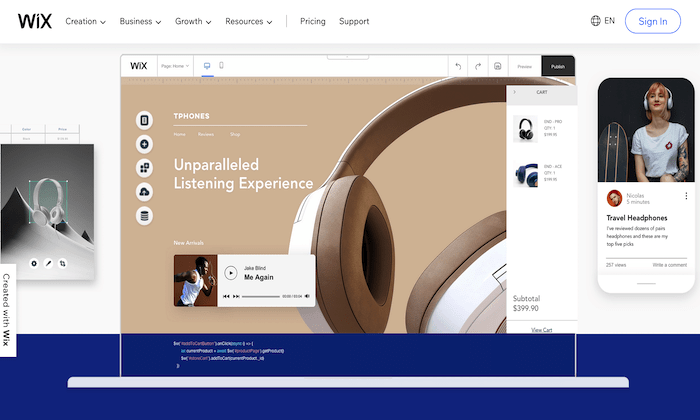
Wix is my favorite website design tool. This is essentially an alternate method of getting around web design altogether.
As a free website builder, Wix makes it easy for anyone to create and design a website from scratch – with no experience, development skills, or design knowledge.
The reason I love Wix so much is because it's just so effortless. Even for such a simple tool, the final design always looks professional. People just assume you've hired a designer – it's that good.
Another reason I recommend Wix so much is because of its versatility. It can meet the design needs of virtually any type of website under the sun. From simple blogs to portfolio websites, online stores, restaurant websites, small business websites, and more, Wix can do it all. Other website builders on the market just don't have the same versatility.
Continue below and I'll show you how to use Wix to create a website for free.
The first thing you need to do is sign in to Wix. So go to Wix.com and create an account. It's 100% free and you don't even have to provide your credit card information.
Just click on one of the many Getting Started buttons on the home page or anywhere else on the website.
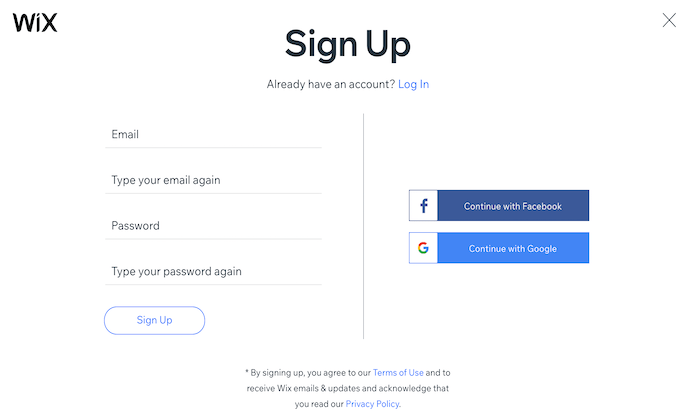
Unlike other platforms, the Wix login process can be completed in seconds. No complex form fields have to be filled out. All you need is your email address and a password.
You can even bypass the input and sign in via Google or Facebook with a single click.
Once you're signed in, Wix will automatically guide you through the website design process.
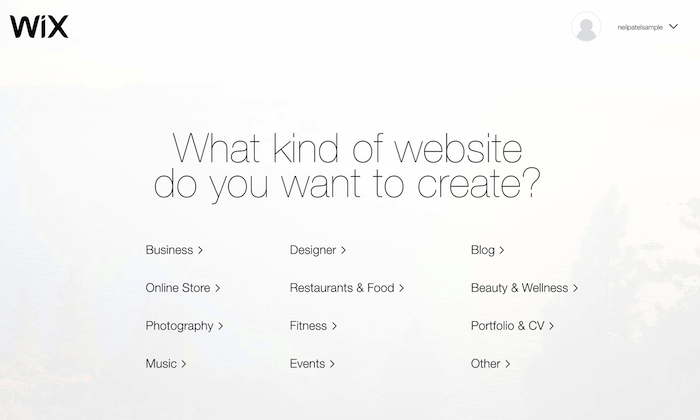
Step 2: choose your website type
Next, you need to figure out what type of website you want to design. Your answer will have a significant impact on your design decisions.
For example, a personal blog and an ecommerce website have huge differences in design choices. A portfolio website that features photography or custom art is not the same design as a local restaurant website.
Wix makes this step easy for you. You will be asked to choose your website type from a variety of potential options.
Based on your answer, Wix will automatically present you with the appropriate templates in this category. For example, if you select Online Store, the layout includes product pages and product categories, and makes it easier for you to design an ordering process.
Once you've chosen a website type, Wix gives you two options for your design:
- Let the Wix ADI create a website for you.
- Create your website with the editor.
The first option is straightforward and great for people who are in a hurry. You just answer a few simple questions and Wix will create a website for you based on your answers. It's impressive how quickly the process takes. In less than a minute, you will have a brand new custom website design. The design is beautiful and aside from customizing the pages with your own content, you are done.
For the purposes of this tutorial, we'll stick with the second option: create a site with the Wix editor. This gives you more freedom and control over every aspect of the design choice.
Step 3: choose a template
Instead of trying to design a website with a blank canvas, it's a lot easier to start with a template.
Take a few minutes to browse the different options. Which styles do you like? Which templates emulate your brand image? Wix has thousands of templates to choose from. It can be a bit overwhelming at first. But limit your focus based on your specific website type.
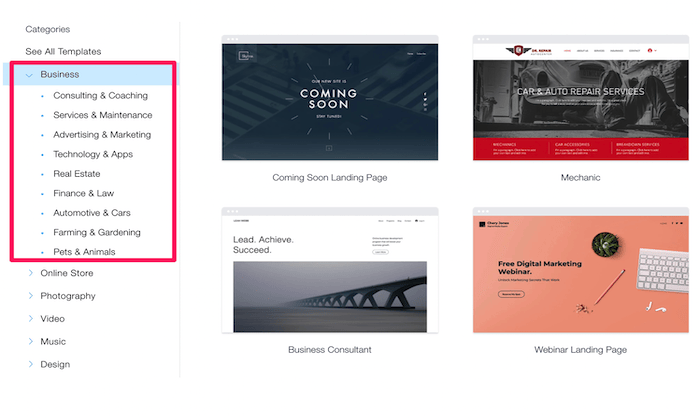
In this example, I'll choose a "Business" website. But that's a really broad category. Looking at the left side of the screen allows you to further narrow your focus on types of businesses.
Wix has specific templates for consultants, real estate companies, professional services like finance and legal, marketing, and more. Each website type has different sub-categories with templates.
For example, if you select "Store Online," you'll see templates for clothing, jewelry, electronics, home decor, beauty items, exercise equipment, and more. When you're designing a blog website, Wix has templates for personal blogs, travel blogs, fashion blogs, podcasts, and more.
Your template becomes the foundation for the rest of your website design. So take your time and don't rush through this step. You can still customize various design elements to your liking, but this is much easier with the right template.
Step 4: edit your layout
Website visitors form an opinion about your website in less than a second after landing on the homepage. This is why design is so important and it all starts with the right layout.
Wix templates have already been optimized for a user-friendly design. However, you have the freedom and flexibility to make some changes here.
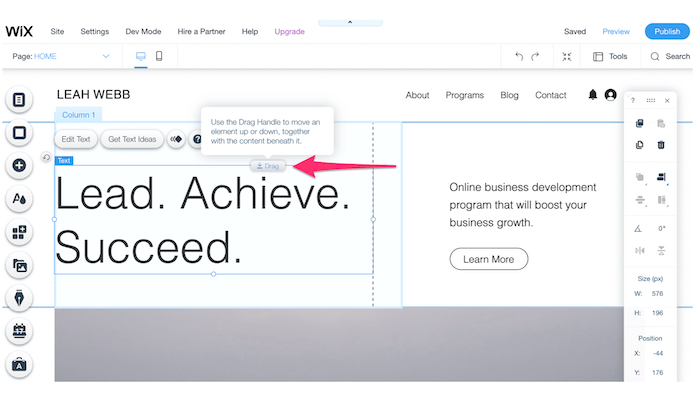
In this example, I'm editing the Business Consultant template. Suppose I wanted to move the heading position on this homepage. I'll just click the box in the Wix Editor and drag it to another place on the page.
Or maybe I want to reposition this "Learn More" call to action in the right half of the screen. I can click on it and drag the button anywhere.
I encourage you to get a few things moving when you first start. This will introduce you to the Wix editor so you can feel comfortable later. Ultimately, if you don't want to make any layout changes, you can always revert to the original design.
Step 5: prepare your content
The content is an essential part of the design of your website. You cannot completely finish the design without knowing exactly what materials are displayed on the site.
Gather images, videos, GIFs, logos, slogans, text (copy) and anything else you want to display on your website.
Let me show you an example to illustrate my point.
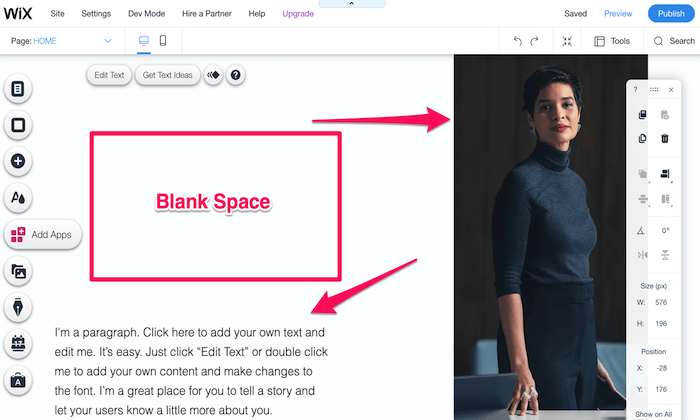
I'm still working on the same template for business consultants. One of the first things I would do on this part of the page is to swap the picture with a picture of myself. But before I do that, I also need to think about the appropriate copy of the text at the bottom left of the screen.
By default, the template has a space here, as highlighted above. While spaces are an important web design trait, I don't like the way they are used in this case.
So these are my options:
- Use a full length photo (like above) and add a paragraph in the blank box.
- Use a smaller photo (like a headshot) and just a single section of text.
Both will accomplish my goal of removing that blank section of the page. Do you see how one component affects another? All of this is design related and it's much easier if you have your content prepared in advance.
Step 6: define your branding strategy
Think about how visitors perceive your website. Things like the color scheme, fonts, and other design components directly affect your branding image.
Click on the "Theme Manager" on the left side of your Wix editor. This is the button with an "A" and a raindrop or drop of paint.
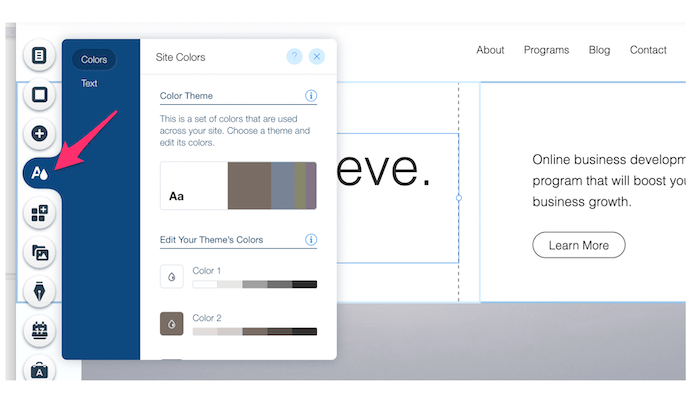
From here you can change the theme colors of your website. You also have the option to edit your standard text topics for headings and paragraphs.
In this case, the current color scheme works well for a business consultant. It's modern and professional. For example, let's say you've designed a website for children. You could have a little more fun with bright colors and big, bold fonts.
If you already added your company logos and other materials in step 5, you'll want to make sure the color scheme goes well with the rest of your content.
Step 7: add landing pages
Your landing pages each have a unique design. While they should all follow the same branding principles and themes as your homepage, there are some variations in the design options.
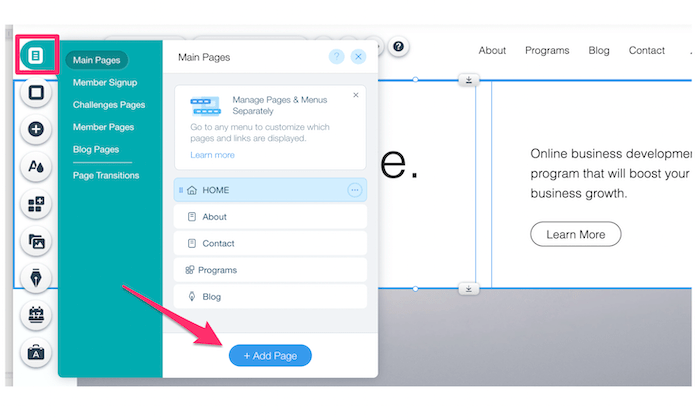
To add a page, click the top icon on the left side of your Wix editor. Then click "Add Page" as highlighted below.
New pages are essentially a blank canvas, except for your header and footer. But instead of starting over, you can add a strip to each page depending on the content it contains.
Just click the "+" button in the editor to browse a few options.
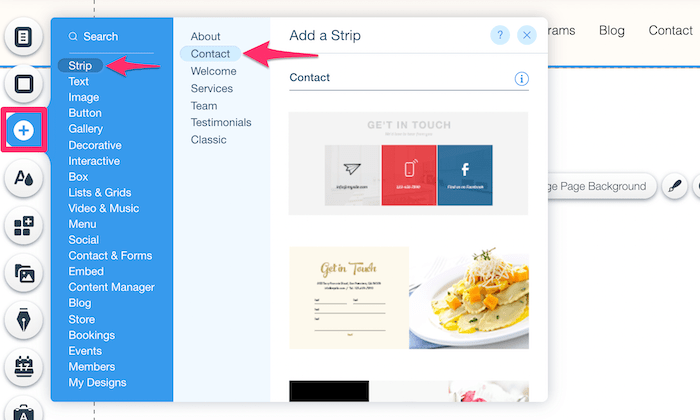
Think of this as a mini-template. Apply the same principles that you used in step 3 when you first selected your entire site template.
This is just an easier way to design new landing pages. Wix already offers so many great options that it's not worth building your pages from scratch.
Step 8: focus on usability
Sometimes during the design process you lose focus on how visitors interact with your website. However, the user experience (UX) cannot be overlooked.
There are certain design best practices that people expect when visiting a website. For example, you might expect the navigation menu to be at the top of the page. You expect the footer to contain contact information. They expect the logo to bring them back to the home page.
Let's look at something simple, like a navigation menu:
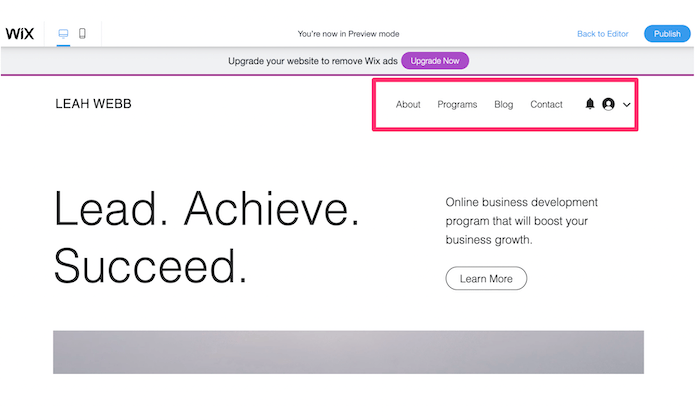
In this example the menu has only four pages. You might get away with adding an extra or two. But beyond that, it's too much.
Imagine if this website had 10 or 20 pages in the menu. It would be a disaster. The top of the page would be too cluttered and visitors would never find what they are looking for. Overall, that would be a poor design choice.
Keep usability in mind with any design choice, from CTA placement to scrolling effects to spaces, architecture, and everything in between.
Don't try to reinvent the wheel here. Follow web design best practices and UX will be fine.
Step 9: tweak the design for mobile devices
According to Statista, around half of all global web traffic comes from mobile devices. So there is a possibility that every visitor to your website is surfing from a smartphone or tablet.
You need to make sure that your website design is suitable for cell phones. Otherwise, visitors will bounce and you will never get mobile conversions.
Fortunately, Wix makes this process easy for you.
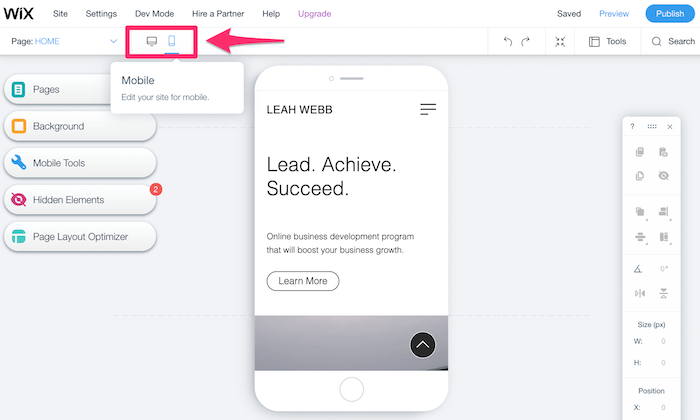
Simply click the mobile icon on the editor or preview page to switch from the desktop view of your website.
Wix automatically optimizes your website for mobile phones. However, it's still a good idea to double-check everything for yourself to see if you want to make any changes. Whenever you see something you want to change, you can edit your website's mobile design without changing the desktop version.
Step 10: publish your website
Once you have the design done, it's time to go live with your website on the web.
It's worth noting that your website doesn't have to be 100% ready to be published. You can always go back and add pages at a later time. However, once you have a homepage, page, contact us page, and a handful of site items, publish them so you can generate traffic. Just make sure you don't post any incomplete pages.
Click the blue Publish button in the top right of your Wix Dashboard to continue.
As I said earlier, you can design and publish a website using Wix 100% free. But there is a catch.
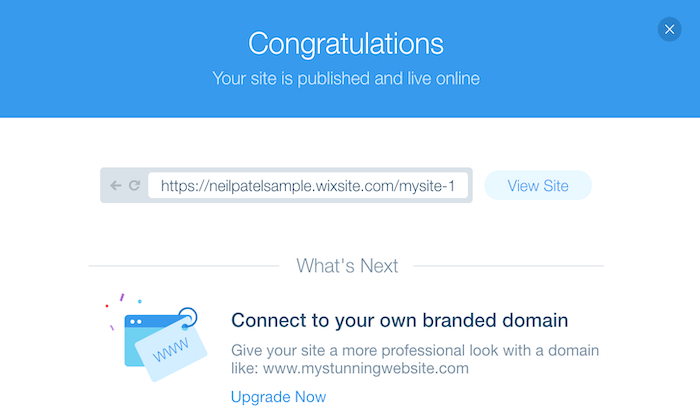
Free Wix users cannot customize their domain. All domains contain your Wix account name, followed by the Wix branding and the name of your website. As you can see in the example above, the domain here is:
http://neilpatelsample.wixsite.com/mysite-1
This is not a viable option for business related websites. It's okay if you're just using the website to mess around with web design principles. However, if you want a legitimate website with real visitors, you'll need to upgrade to a premium Wix plan.
Now you can use a custom domain name purchased either directly through Wix or from a third-party domain registrar. If you don't already have a domain, simply get one from Wix. It's easier to manage everything from a single platform.
Conclusion
The design of the website has really evolved over the years. What used to be a major challenge or an expensive endeavor for new website owners can now be easily accomplished.
Website builders like Wix essentially eliminate the need to redesign websites from scratch.
Non-technical users and those with no design experience can choose a template and populate their website with custom content. There's no need to learn web programming languages or hire a designer.
Sign in to Wix, follow the step-by-step steps listed above, and you will have a professionally designed website in minutes. As simple as that!

See How my agency can drive Firmly Traffic volumes on your website
- SEO – Unlock tons of SEO traffic. See real results.
- Content Marketing – Our team creates epic content that is shared, links accessed and visitors drawn.
- Paid media – effective paid strategies with a clear ROI.
Book a call