Tips on how to set up WordPress
Disclosure: This content is endorsed by the reader. So if you click on some of our links we may receive a commission.
Choosing WordPress is the best way to get your website started on the right foot. It's a powerful, flexible, and arguably best-known content management system that is great for beginners and experts alike.
To get the most out of WordPress, you need a great hosting service.
Your web host does a lot when it comes to your website. It determines how reliable, how fast, and how much downtime your website has. Then there is security, 24/7 support, plugin support … the list goes on.
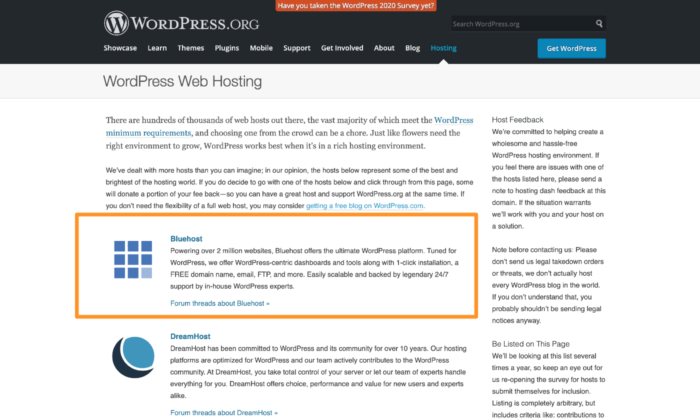
As someone who has built and managed many websites in my career, Bluehost is my holy grail for WordPress hosting. And not without reason!
Installing WordPress on Bluehost is very easy as it is installed automatically when you log in. Additionally, Bluehost is officially recommended by WordPress and is the world's largest web hosting company. We're talking over two million domains folks!
And all it takes is five minutes to get everything sorted.
In this guide, I'll show you step by step how to install WordPress with Bluehost and set up your WordPress website.
Let's start.
Your 2 minute cheat sheet
Do you have too little time? Here's a quick rundown of everything you need to know about installing WordPress.
First of all, you need to choose a reliable and affordable web hosting provider – similar to Bluehost. That's why I chose him as the hosting provider for this guide.
You need to sign in to Bluehost. This includes additional steps like choosing a hosting plan, creating a new domain name, verifying account details, and making payment.
As someone who loves to get a fantastic deal (who doesn't?) I advise you to go for the 36 month plan for the cheapest deal. I know a three-year commitment sounds risky right off the bat, but trust me – it's worth it.
Next, you need to shift your focus to installing WordPress on Bluehost.
You first create a website. Go to My sites and then Create site. After you've entered your website information, all you have to do is select your domain and click Next. Bluehost starts the automatic installation of WordPress.
However, just installing WordPress is not enough.
You need to set it up and customize it to benefit from starting a website. You can either use the regular WordPress dashboard or the Bluehost dashboard to set up your website. Since we're focusing on using WordPress with Bluehost, I'm going to cover how you can use Bluehost tools to customize your WordPress website.
Choose a theme or design for your website by visiting the Bluehost Marketplace. Also, install additional WordPress plugins that you think can improve the functionality of your website.
Bluehost will automatically install some WordPress plugins that it deems essential, such as Akismet Anti-Spam, Jetpack, and MonsterInsights. You can either leave the plugins or delete them and install new ones – the choice is yours!
Next, create relevant content for your website, and then click Start your site.
Voila! Your WordPress website is now available on Bluehost's servers.
Would you like more details? Read on as I get into all of the details.
Step 1: Sign in to Bluehost
Before installing WordPress, you'll need a Bluehost account.
This is a comprehensive process of choosing your hosting option, domain name, and payment for your subscription.
Choose a hosting plan
A good hosting plan should suit your needs, and Bluehost gives you plenty of options to make sure you choose the best one.
Your options include:
- Shared hosting
- VPS hosting
- Dedicated hosting
- WordPress hosting
- Managed WordPress
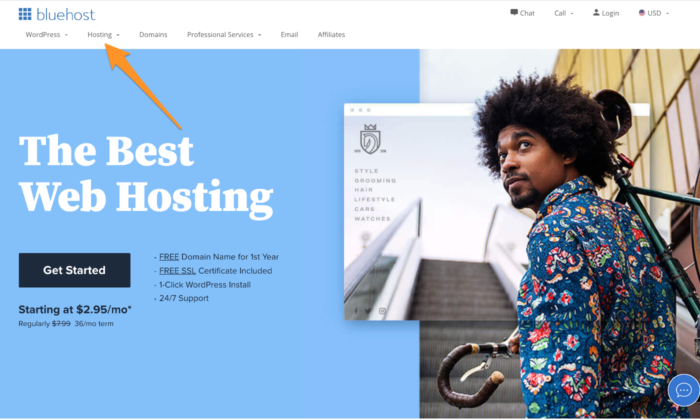
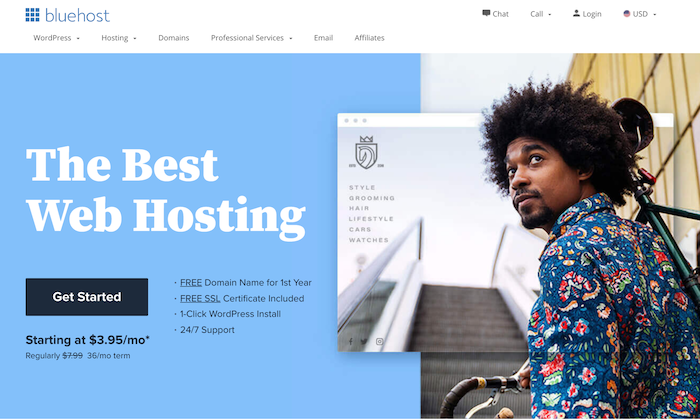
I recommend starting with the cheapest shared hosting plan – assuming it suits your needs. You have options that start at $ 2.95 per month, such as: B. the shared WordPress hosting plan so you don't have to feel restricted. Click here to learn more and to sign up.
Get a new domain name
If affordability doesn't make Bluehost one of your top web hosting providers, the fact that it has tons of useful freebies will do too.
You get a free domain name (for the first year) with all Bluehost plans. Once you've chosen your hosting plan, just click on it Create a new domain and choose your free domain.
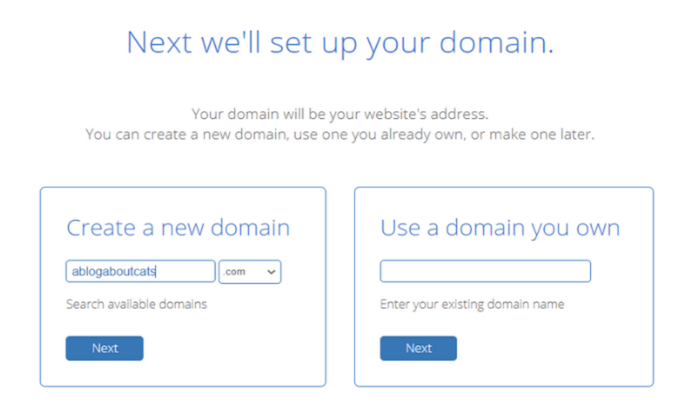
Enter your chosen name in the domain search and Bluehost will display a list of available or similar domain extensions. I would also like to encourage you to go for a .com domain as it looks more professional. It also allows you to collect brownie points in the eyes of your visitors.
If you already have a registered domain with a third-party domain registrar, you can continue to use it instead of creating a new one with Bluehost. Click on Use a domain you own and press Next. Bluehost will walk you through the process.
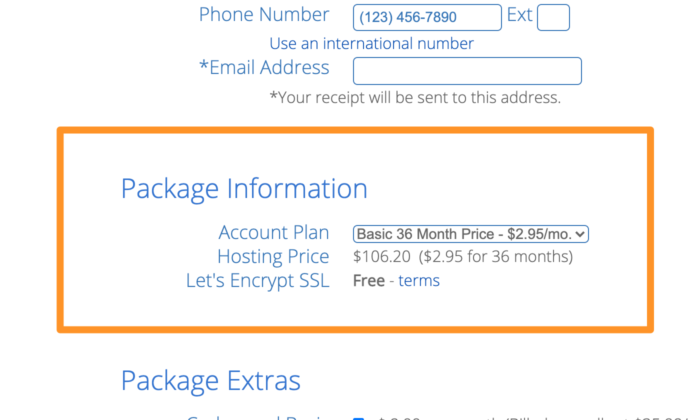
Enter your account credentials and confirm your plan details
Enter your personal information to create your account on the website. You can also sign into Google to speed up the process.
Next, you'll need to confirm your plan details.
Bluehost has several premium add-ons by default. So go through them carefully and remove those that are not needed. These include:
- Domain data protection + protection (starts at $ 11.88 per year)
- SiteLock Security Essentials (from $ 23.88 per year)
- CodeGuard Basic (from $ 2.99 per year)
- Bluehost SEO Tools (from $ 23.88 per year)
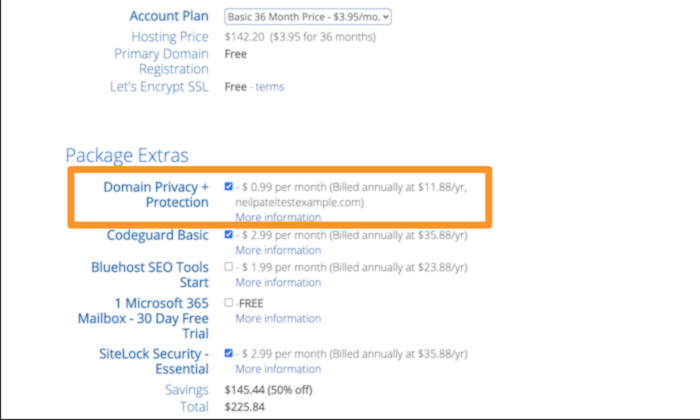
I strongly recommend investing in Domain Privacy + Protection as your personal information is not publicly available and will be replaced with Bluehost's business information. As a result, no one can access your phone number, email address, or home address.
Lastly, you can set the number of years you want to log into Bluehost. Although the minimum commitment is one year, you can pay up to three years in advance. This is highly recommended as it will give you the best value.
Pay the subscription fee
Finally, all you have to do is enter your payment details and confirm your order.
You will see the payment information section where you will need to enter your payment details. You can either pay by credit card or look for other payment options.
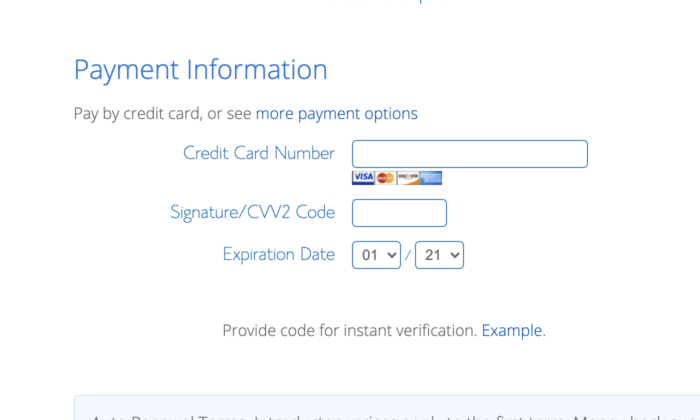
The good news is that Bluehost offers a 30-day money-back guarantee. If you are unhappy with your service, you can always get a refund.
Step 2: Install WordPress on Bluehost
With your web hosting provider set up, you can focus on installing WordPress on the host.
Just like creating an account, WordPress installation is quick and easy thanks to the hosting provider's user-friendly interface and one-click installation feature.
Just follow the steps below to install WordPress on Bluehost.
Build your website
After logging into your Bluehost account, go to My sites Side menu tab. Click on Create site is located at the top right of your screen.

Then enter basic information about your website, such as: B. Your website name and slogan.
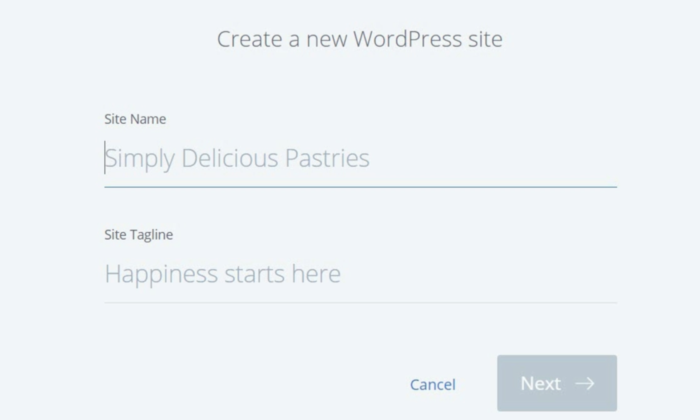
Still lacking inspiration or not sure if they are perfect? No problem! You can always change this later.
Install WordPress on your Bluehost account
Before installing WordPress, you need to select your domain name. In the Select Domain field, select the domain name that you previously specified when you created your account.

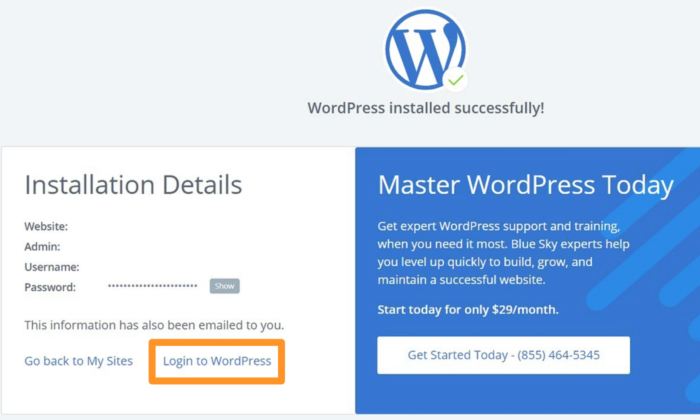
As soon as you click on NextBluehost will start installing WordPress for you. You will automatically receive your brand new WordPress website as well as login information.
Do you want to open your new WordPress website? Click on that Log in to WordPress Shortcut.
Step 3: set up your new WordPress website using the Bluehost dashboard
After installing WordPress, all you have to do is customize it so that your website better represents your brand and yourself.
You can build your website using the regular WordPress dashboard. However, in this article, I'll show you how to set up your WordPress website using Bluehost tools.
All sorts of things can be done on the Bluehost dashboard, including:
- Manage menus
- Add new pages and posts
- Test your website
- Create an ecommerce store with the WooCommerce plugin
- Turn off the Coming Soon page and get your website live
Some of you may find that most of these are the most important WordPress features. It's just in one convenient place to make everything straightforward and more accessible for you.
However, let's discuss how you can use the Bluehost dashboard to set up your WordPress website.
Use the quick start wizard
Once you open your WordPress dashboard, the Bluehost Quick Start Wizard will appear. Use it to install important plugins and get your website started.
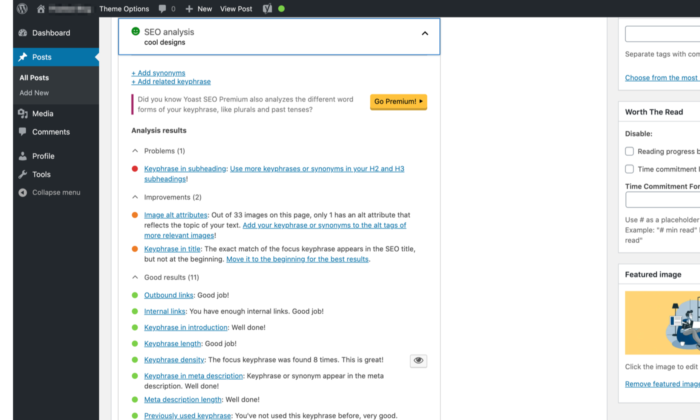
For example, you can use Yoast for SEO, WPForms Lite to create contact forms for lead generation, and other security and caching plugins.
Choose a theme or design for your website
WordPress themes are amazing. You control how your website looks and how functional it is. This is exactly why choosing the right WordPress theme is so important.
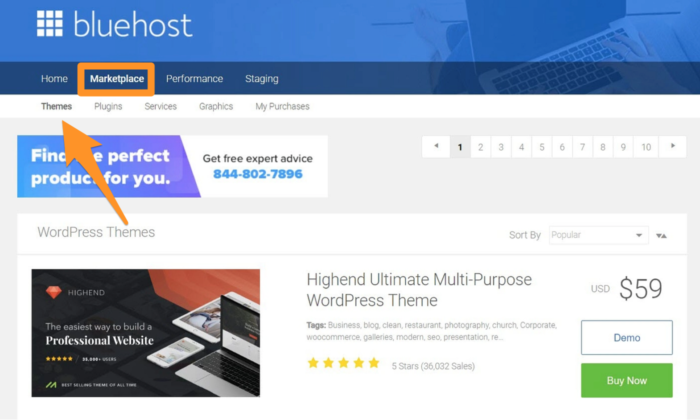
Click on that Marketplace Tab in the Bluehost dashboard followed by subjects. This will open several premium WordPress themes.
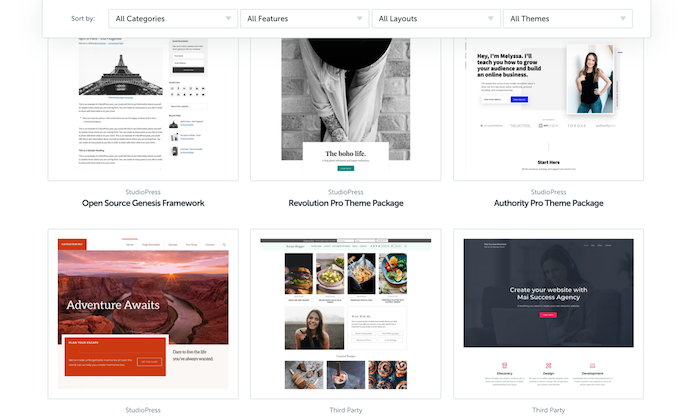
However, you do not have to limit yourself to this selection.
Outside of the Bluehost marketplace, there are thousands of free and paid WordPress themes available. So, before making a selection, browse through all of the options.
In Elegant Themes, StudioPress, ThemeForest, and ThemeIsle, you can find stylish themes that are functional and fit your budget.
Install additional important WordPress plugins
When you create an account with Bluehost, it will automatically install several WordPress plugins that it deems useful. This includes Akismet, Jetpack, WPForms Lite, and MonsterInsights.
Of course, you have the option of deleting one of these plugins or installing your own. Yoast SEO, Wordfence Security, UpdraftPlus, and WP Rocket are some of the best WordPress plugins that can really take your website to the next level. You can see more of my top tips and reviews of WordPress plugins here.
Create content for your website
Next, create content for your website by adding pages.
Go to in your WordPress dashboard Bluehost menu. Click on that content Tab followed by pages and Add new page. Here are some commonly used pages that you can add:
- Home page: This is the page your visitors land on when they visit your website. So you have to do this right! It's best to include high-performing images, eye-catching calls-to-action (CTAs), and directional content to drive maximum engagement and conversions.
- About page: This is where you share your story, discuss your philosophy, introduce your team, and add other introductory information that can help you build a relationship with your visitors.
- Contact page: This page contains information so that visitors know where to contact and visit you. It should contain a contact form, address, phone numbers, a map with your location, and links to social media. Make sure all of your information is up to date, especially if you don't want to lose customers due to inaccurate information!
- Blog: Almost all websites today have a blog section to attract visitors to their websites and keep them informed. You should also add SEO optimized posts to bring more organic traffic to your website.

Step 4: Finally, launch your WordPress website
Customize how your website looks? Check. Adding plugins to keep your website safe and easy to use? Check. Create content? Check.
All you have to do is (finally!) Launch your website.
Bluehost has a "Coming Soon" page that is activated by default every time you install WordPress. This gives you privacy so you can work on your website without worrying about people seeing it before it's done.
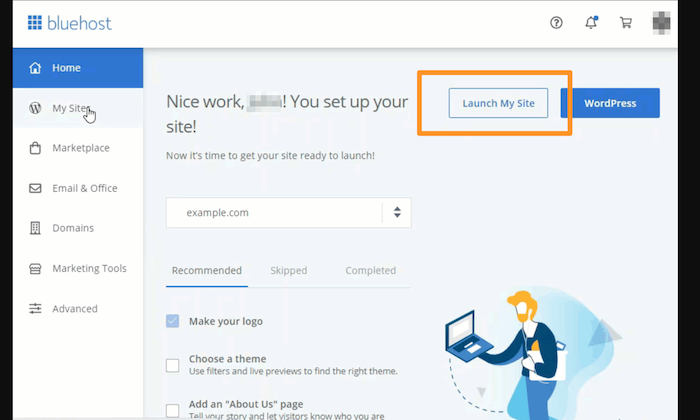
After it starts, click Start my website, and you live!
Conclusion
Congratulations! You have now finally set up a WordPress website with Bluehost.
Bluehost is the most popular option for installing WordPress, but you can always choose a different hosting provider. However, if you want an easy-to-use dashboard, as well as access to a wide variety of tools and features, Bluehost doesn't get any better than WordPress.
Still, the cool thing is that you can build your website all by yourself without hiring anyone. Not only do you have a great website, but you don't have a hole in your wallet either! It's a win-win situation.
Do you think Bluehost is also best for creating a WordPress website? Drop your comments and let me know what you think.

See How my agency can drive Firmly Traffic volumes on your website
- SEO – Unlock tons of SEO traffic. See real results.
- Content Marketing – Our team creates epic content that is shared, links accessed and visitors drawn.
- Paid media – effective paid strategies with a clear ROI.
Book a call