Create an Ecommerce Web site
Disclosure: This content is endorsed by the reader. So if you click on some of our links we may receive a commission.
The future of e-commerce is brighter than ever.
Do you understand what I mean?
But nothing good is ever easy, and starting a thriving online store is no exception.
There is so much to do to build an ecommerce website.
The first place to start your journey is by choosing a suitable ecommerce website builder – one that is efficient and affordable.
That sounds daunting, but it isn't.
Read on as I teach you how to get your ecommerce website up and running in no time, regardless of your level of experience and technical knowledge.
Your 2 minute cheat sheet
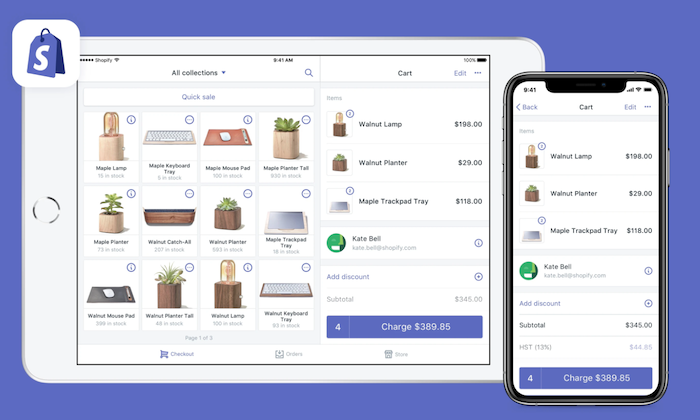
I'm going to show you how to use Shopify to build an ecommerce website.
Shopify is the king of ecommerce, which is why it also ranks first on our list of the best ecommerce website builders.
What works for me is the versatility of the platform.
Whether you're looking to start a new ecommerce business from scratch or scale up, Shopify has everything you could possibly need. There is also the option of a 14-day free trial!
Users can leverage industry-specific templates, custom domains, drag-and-drop store builders, unlimited products, integrated payment processing and 24/7 support.
That's why it's one of the best.
After logging in, you need to set up your online shop. You can customize it by choosing a theme or layout that works best for you.
Next, start by listing products on your website. Here you should also pay attention to the product copy (Hello SEO!).
Upload HD quality photos with your products on a white background. Make sure your pictures are the same dimensions – this will make everything look tidier.
Choose your payment gateway. This feature allows your customers to pay through your website.
You need to consider transaction fees, card types, and off-company checkout to determine the amount of money you will get after all fees.
Get your online store live by filling out tax and shipping information. Take a test drive with your ordering system to make sure everything is on the right track.
Finally, you need a domain name. You can either buy one from Shopify yourself, or opt for a third party – the choice is yours.
And that's it! Your new Shopify store is now ready to rake the moolah.
Without further ado, let's start with the detailed tutorial!
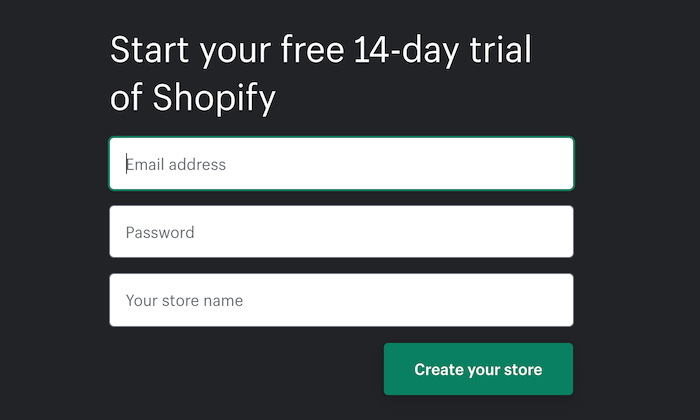
Step 1: create your Shopify account
Go to Shopify.com and use the login form to create your account. You can start your 14-day free trial after entering all the required details.
You should try to choose a unique business name. However, this should not be at the expense of simplicity or relevance.
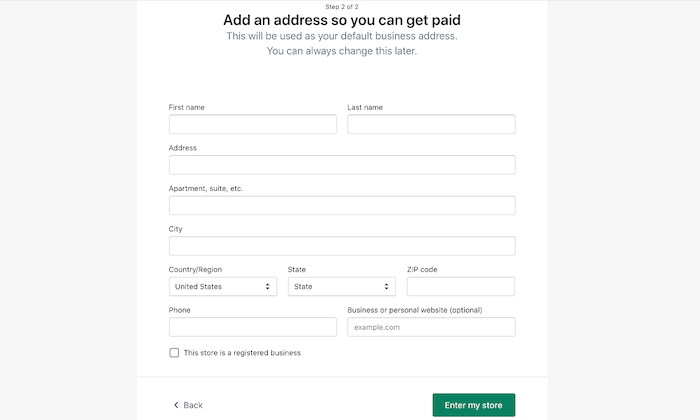
If you enter a store name that you have already chosen, Shopify will prompt you to enter something else again. Once you've sorted the website name, you'll need to fill in some more details such as: B. Your name, address, country and contact number.
After this initial screening, you need to answer if you own products and if so, what you want to sell.
If you're just trying out Shopify, go to "Do you have any products?" Select options like "I'm just playing around". Drop down menu and "I'm still working on ideas" in the "What are you selling?" Section.
When you're done, click I'm done.
Step 2: set up your Shopify online store
Once you've set up your Shopify account, you'll be automatically redirected to your store admin screen or dashboard. Your home admin screen shows you everything you need to know to get your website up and running.
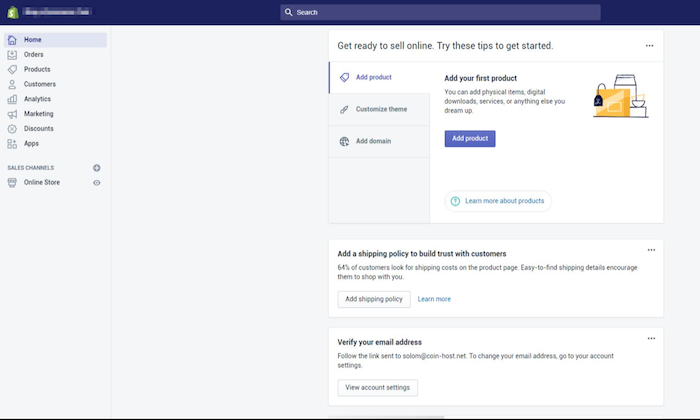
From this point on, you can customize your store, upload products, and set up payments and shipping. You can also find several other options in the side menu bar. At this point, however, you should stick to the basics.
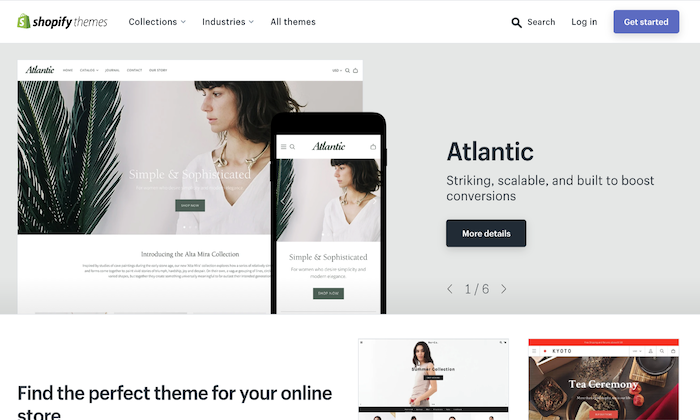
Step 3: Customize your Shopify store by choosing a theme or layout
Shopify gives you instant access to a wide variety of topics thanks to the official topic store. Each of them is guaranteed to be fully supported by the designers. So you can rest assured that your business is always in good hands.
The idea behind choosing a theme is to create an in-brand website that looks great. This will allow your visitors to stay longer on your website and review your products.
Each of the topics has a comprehensive list of changes. You don't need any programming skills.
If you don't like the free themes, you can always choose the premium versions which have more features and customization options. In all fairness this looks a lot better compared to a free one too – assuming you pick the right option.
Another reason I like Shopify so much is that it's incredibly easy to use. Even if you decide to make notable changes to a subject, there are few limitations.
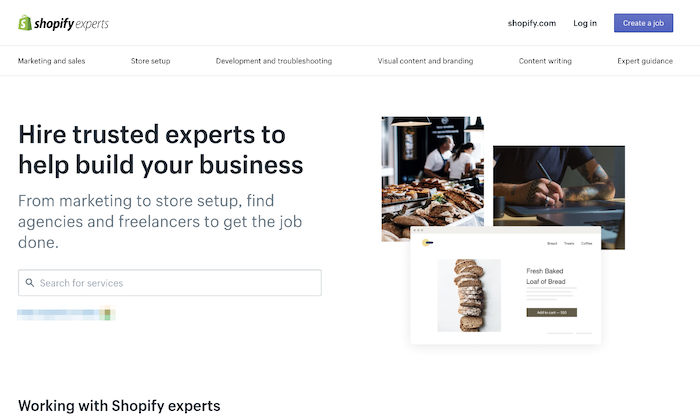
You don't have to worry about lack of programming experience. Shopify has an international team of design agencies called Shopify Experts who can fully customize your ecommerce website. Remember, you have to pay for this expert service.
Here are some quick tips to help you find the right Shopify theme:
# 1 Go through the entire topic store
Be ready to be shocked the moment you visit the url.
You get over 70 variations of themes – some of which are amazing free ones too – to use on your Shopify store. Apart from that, you can also find Shopify themes on other marketplaces like TemplateMonster.
Try to choose a theme that suits your brand and, of course, suits your personal preferences.
You also have the option of filtering the topics by paid or free, functions and industry. If you want to be even more selective, you can add filters for price, popularity and timeliness.
# 2 Check out the reviews of the topic
After you have decided on a topic that you like, click on the sample image. For more information on this topic, check out whether it's cell phone-friendly and responsive, among other things.
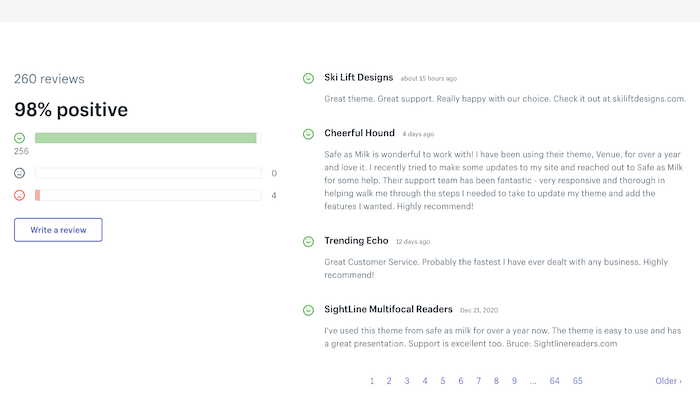
Scroll down to read reviews from people who have used the topic before to learn more about their experience.
# 3 preview of the topic
With Shopify, you can see your chosen topic live. Click on View demo is located under the green button "Preview this topic in your shop".
The preview feature is a great option for topics with different styles. In the absence, you would repeat the entire selection process over and over until you found the correct match. Yikes
# 4 get the Shopify theme
If you like the demo version of a particular theme, all you have to do is click the green button to get it.
When Shopify asks for your confirmation to install the theme, click Publish as the theme of my shop. And if you are still not sure about the topic you have chosen, you can always change it later.
Shopify will notify you once your theme has finished installing and then give you the option to do so Go to your Theme Manager.
This manager contains all published topics (the one you recently installed or activated) as well as unpublished topics (previously installed topics).
Step 4: customize your business settings
Shopify themes are like your personal fairy godmother.
They fundamentally change the look and feel of your ecommerce website and give it a unique look, even if thousands of other users download the same theme.
How is that possible?
You can make simple changes by editing your settings.
Choose subjects from the left navigation menu. You will see your live theme in a box at the top.
This field contains two buttons in the upper right corner of the field. The first with three dots allows you to make fundamental changes to the settings.
You can use one of these to duplicate your theme. I advise you to do this as a backup. If you don't like the changes you made, you can delete them at any time and work from the duplicate again.
The second button is "Customize Theme". Clicking on it takes you to a page that controls all of the basic functions of your business. This is where you can make big changes and test all of the features to understand what your website is really capable of.
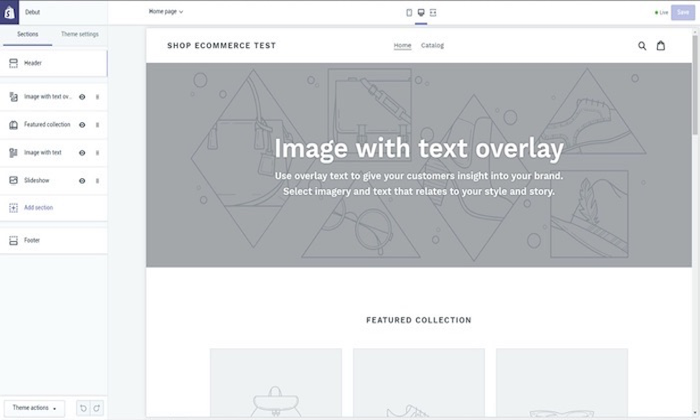
Other options allow you to reposition items on pages, including displaying product images on the left, right, or center of the page. You can also choose to show social media icons like "Like", "Tweet", "Pin" or "+1".
Step 5: List Products on Your Ecommerce Website
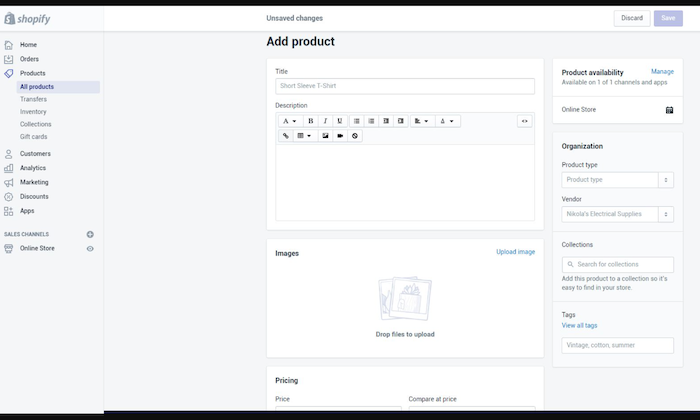
Click on Products in the menu on the left side of your administration screen.
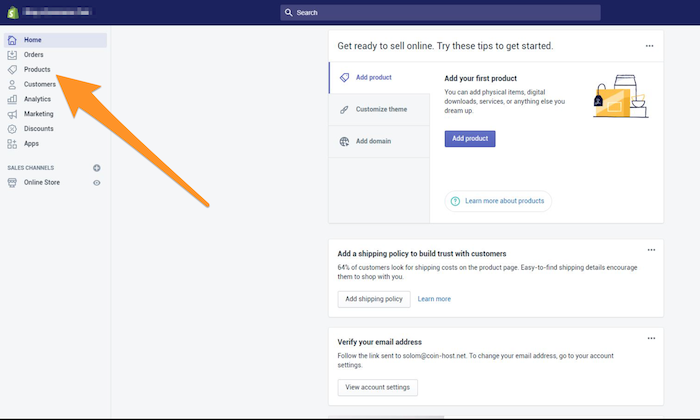
You see a blue add product Button in the middle of the page. Click it. This way you can add as much detail to your products as you want.
Look for products that can do with some SEO optimization, including the name, description, and URL. Try to add as much detail as possible to give your customers a clear idea of your products.
This is also the screen where you upload photos of your products in HD quality – preferably on a white background. Once your images are uploaded, you can rearrange them however you want so that you don't have to upload them in any particular order.
I really can't emphasize the power of product images enough.
Product images contribute significantly to sales. For this reason, you should be careful to add only the best images that highlight special or unique features in the close-up shots of the elements.
Another tip would be to make sure that all of the images are the same dimensions.
This gives your website a very neat appearance. However, if you want your pages to resemble a Pinterest board, you can too.
Finally click on Save product located at the top and bottom right to save all of your changes.
But that's not all.
Whenever you add photos, make collections to entice your visitor by providing multiple similar options on the same page to increase your sales opportunities.
Option A: Set up collections of product groups
A collection of a group of products contains items that have some similarities. Here are some collection ideas to consider:
- Item for sale
- Items in specific colors and sizes
- Elements differentiated according to gender and age, such as men, women or children
- Items belonging to the same product category, such as fans, chargers, jewelry, etc.
The interesting thing is that a single object can appear in any number of collections. For example, a medium-sized white shirt is listed in at least three collections: White Color, Women / Men, and Medium Size. You can list your collection names on the homepage in the navigation bar.
Your customers will thank you because they don't have to go through your entire catalog to find a specific item.
Option 2: Manual and automatic acquisition
When adding a new collection, you can choose how to add the products. There are currently two ways to do this:
- Manually – You add and remove products individually from the collection.
- Automatically – You set up certain selection conditions under which products are automatically added that meet the criteria.
At the same time, choose a payment gateway. With this feature, your customers can pay for products directly through your website.
However, not all payment gateways are created equal.
Make sure you go through transaction fees, card types, and checkout outside of the company to pick an option that works best for you.
Step 6: make your Shopify store live
Before your website goes online, you need to add a few more details about your business, how you will ship the items and pay taxes.
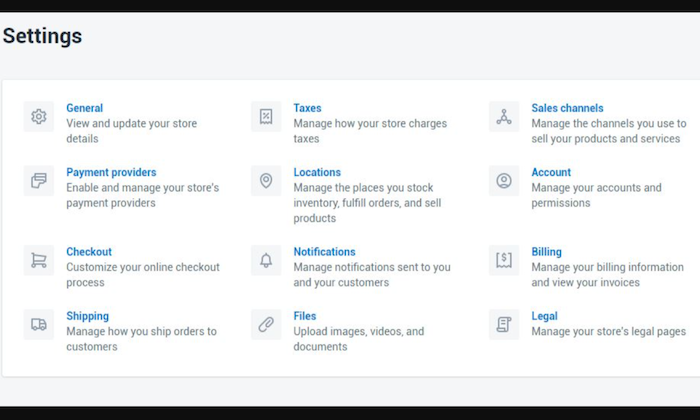
Check the boxes against charge tax and Requires shipping Wherever applicable. You can find these options in the "Variants" section of the Products Page after clicking on the name of a specific product.
Go to the settings to fill in this information. I would recommend using the Google Analytics feature to keep track of your shop's visitors as well.
Perform a test transaction
This is the ultimate test of determining if your store is on the right track and to get an idea of what your customers will experience when they place an order on your Shopify store.
You can use Shopify's Bogus Gateway for this.
- Choose the settings out of your business Administrator, followed by Payments.
- If you've activated the credit card payment gateway, deactivate it. Click on To editand then confirm your deactivation after selecting Deactivate.
- In the Accept credit cards section, select the option Choose a credit card gateway. This will open a drop-down menu.
- Scroll down to Otherand then select Bogus gateway.
- Choose activate-or Reactivate if you have already used Bogus Gateway.
- Return to your store and place an order like a customer normally would. Please enter the wrong credit card details instead of the original numbers at checkout.
If you prefer a real transaction, you can too. Remember to cancel the order immediately to self-refund and avoid paying transaction fees.
Step 7: get a domain name
You need a domain name to go live with your website. I'm going to tell you two ways that you can do this:
- First of all, you can buy a domain from Shopify and it will be automatically added to your shop. This is time-saving and great for people who don't know a lot about web hosts. This costs between $ 9 and $ 15 per year.
- Second, you can buy a domain from a third party like GoDaddy. These domains start at $ 10 per year. Remember that in this case you will have to redirect the DNS records yourself. If this is not what you want, it is better to buy a domain from Shopify yourself.
If you'd like your Shopify store to go live on a third-party domain, do the following:
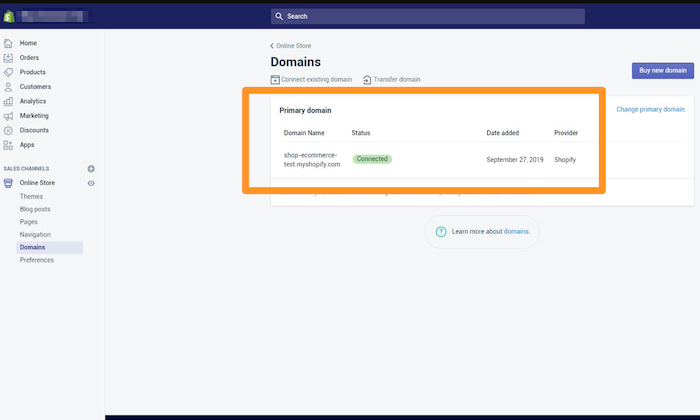
# 1 Add the new domain in Shopify.
Go to the left navigation menu on the admin page the settings and then Domains. Add your domain name after clicking "Add an existing domain& # 39; Button.
# 2 Update your DNS records.
Sign in to your domain registrar (example: GoDaddy) to make the following changes:
Replace the @ or main A entry with the following IP address: 23.227.38.32
Add or replace the www CNAME with yourstorename.myshopify.com.
# 3 Remove all storefront passwords.
# 4 Set your Shopify store as the primary store.
Go to your online store and click Domains. Select your main domain using the dropdown button. Check those too Redirect all traffic to this domain. This will direct all traffic from other domains to your primary domain.
# 5 Add more domains.
Repeat the first two steps with any other domain you are using. All traffic from these domains will be redirected to the primary domain you specified in step 4.
Conclusion
Congratulations! Your new Shopify ecommerce store is now operational. You are now completely ready to get a taste of being an ecommerce seller.
The good thing about Shopify is that you can customize your store to your liking as often as necessary to keep everything convenient and functional for you.
Keep experimenting and you will find your mantra for success.
Which Ecommerce Website Builder Do You Prefer? Is it Shopify or others like Wix, WooCommerce or something else? Let me know in the comments below.

See How my agency can drive Firmly Traffic volumes on your website
- SEO – Unlock tons of SEO traffic. See real results.
- Content Marketing – Our team creates epic content that is shared, links accessed and visitors drawn.
- Paid media – effective paid strategies with a clear ROI.
Book a call