Learn how to get an SSL certificates
Disclosure: This content is endorsed by the reader. So if you click on some of our links we may receive a commission.
Your websites must look legitimate and trustworthy. Especially if you want to increase sales, revenue and customer loyalty or even rank higher on the search engine results pages (SERPs).
And the best way to do it? Obtain an SSL certificate.
I have one, and I strongly encourage you to have one too.
But how much fuss is there about getting an SSL certificate?
Top-notch website security and a great reputation are required to be trustworthy by any audience. While you may know your website is secure, you can't assume your visitors will get the same impression, especially with recent data hacking and security breach events.
This is where SSL comes in.
An SSL (Secure Sockets Layer) certificate is a code on your web server that enables an encrypted connection to keep all of your online communications safe and hidden.
Imagine sealing a letter in an envelope before sending it out in the mail.
For websites with an active SSL certificate, the application protocol is changed from HTTP to HTTPS. Just take a look at our website address:
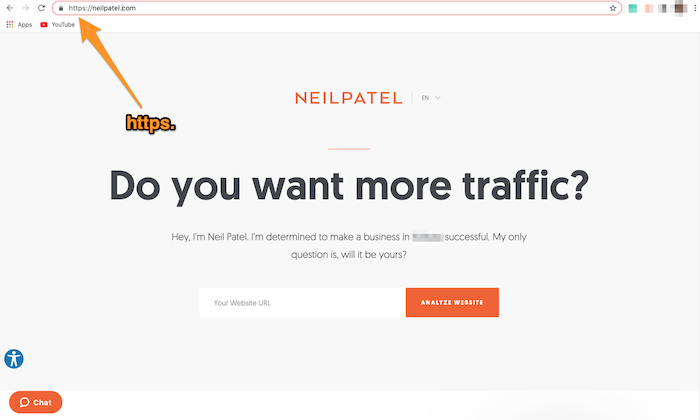
If you are looking to earn brownie points in the eyes of your visitors, getting an SSL Certificate should be your top priority.
As a staunch supporter of SSL Certificates and as someone who has owned and managed dozens of websites over the course of my career, I'm going to show you how to get an SSL Certificate.
Would you like to hear something even better? I'm going to tell you how to get it for free with Bluehost.
Your 2 minute cheat sheet
Are you in a hurry and want the gist of the entire travel guide? I have you.
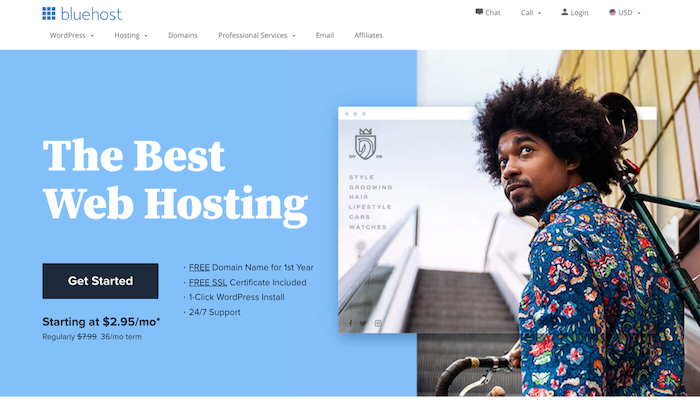
The first thing to do is visit Bluehost. It's reliable, well-known, and pretty much all of the positive adjectives that you would use to describe a good web hosting provider.
Since there are different types of web hosting, the first thing you need to do is choose the right one for your website. Take into account things like traffic, whether or not you have the technical knowledge to handle servers, and of course your budget.
Every company is unique – including yours. Don't choose a type of web hosting just because your friend decided to. Instead, choose one that suits your needs.
For example, shared hosting would be a wonderful choice for startups. However, this can be disastrous for websites with higher traffic. Dedicated hosting services are much better suited for larger websites to handle day-to-day traffic and maintain high speeds.
The next few steps revolve around signing up for your Bluehost account.
You should choose a subscription after considering its top features and freebies. Don't worry, each of them comes with a free SSL certificate so that part is covered. Thank you, Bluehost!
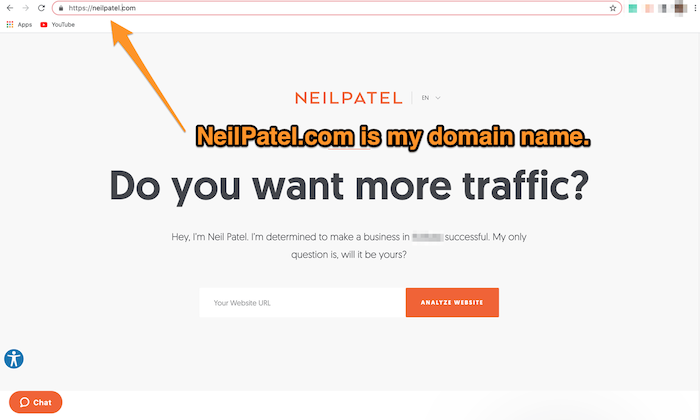
You also need a domain name that is your website's exclusive address in the vast world of the internet.
You don't have any domain ideas yet? Don't worry, you can skip this step and enter your personal information to create your account.
Next, you'll need to set your plan terms and payment details.
While SSL encryption is automatically deactivated in the list that appears, you can add further upsells such as SiteLock Security and SEO tools if necessary. I recommend going with SiteLock Security because there isn't too much security on the internet.
You can either pay by PayPal or by credit card – whichever is most convenient. Both options are equally secure, so you can easily rest on the security of your financial information.
Bluehost has a 30-day money-back guarantee. If you don't like the service, you can always cancel it and get a full refund. Note that this guarantee does not apply to additional products.
Made it this far? Brilliant.
All you have to do is activate SSL. You have two options here, and the action you take depends on whether the certificate is assigned to your website. These are as follows:
- The SSL is automatically assigned to your website and installs itself on your account domains.
- You have to activate the SSL certificate manually.
You don't have to do anything in the first case. However, if you need to enable SSL manually, there are a few additional steps required.
First, go to the Bluehost Control Panel. Select there My sitesand find the website that you want to enable SSL for. click on Manage site Button and then select the security Tab.
See the Free SSL Certificate Field?
If you find that the certificate is already activated, the toggle will turn green. If not, choose On to activate it.
You now have an SSL certified web hosting provider. Mission accomplished!
That was your quick cheat sheet.
Now let's focus on the details of how to get an SSL Certificate through Bluehost.
Step 1: choose a hosting type for your website
Bluehost is probably the best known and most reputable web hosting provider out there.
Not only is the hosting provider incredibly easy to use and affordable, but they also give you a free domain and SSL certificate – provided you buy one of their hosting plans.
Bluehost offers its users three hosting plans, each with their own features and benefits. These are:
- Shared hosting
- Special hosting
- VPS hosting
Shared hosting
This type of hosting is best for startups and small businesses. This is where multiple websites share the same server resources, making them more affordable and beginner-friendly.
However, these benefits come at a price.
You may have to deal with slow load times and potential performance issues. However, this isn't a deal breaker as websites that generally opt for shared hosting don't expect much traffic.
Special hosting
People prefer dedicated hosting because of its exclusivity and unparalleled performance. You can run an entire server just for your website without sharing it with other users.
However, you need to be willing to pay a premium price for these premium features.
Since larger websites are willing to pay a higher amount to efficiently manage higher traffic and often have the technical knowledge to manage an exclusive server, dedicated hosting is the most useful for them.
VPS hosting
VPS hosting stands for Virtual Private Service and is designed for websites that want better performance – one that is better than shared hosting.
The good thing about this type of hosting is that it gives you guaranteed resources. While you technically share a server with other websites, you have dedicated resources on your virtual server.
You can choose from the above three plans based on your needs and website size.
Are you looking for an option specifically tailored to the needs of your WordPress website?
Bluehost offers various hosting plans that also come with an automatic WordPress installation. They are also optimized for WooCommerce, which can be useful for users who want to start an online store.
In total, you have three options for web hosting. Choose a type that you think best suits your needs.
Step 2: choose a hosting plan
At this point, you have chosen the type of hosting you want. The next step is to choose a subscription plan.
I am assuming that you are just starting out and that you prefer the shared hosting plan.
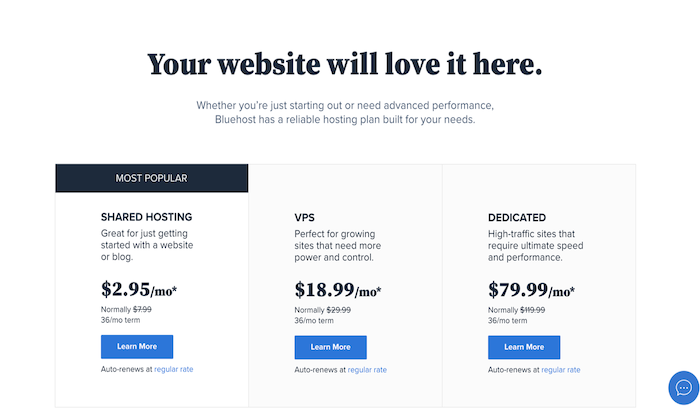
You get four plan options starting at $ 2.95 per month (if you select the 36 months option).
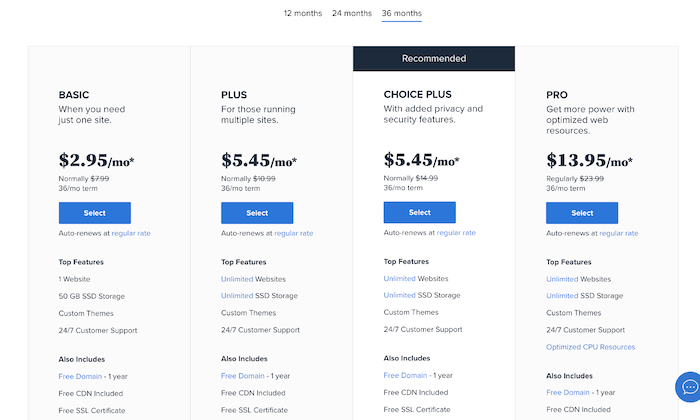
As you can see in the screenshot above, each plan comes with a free SSL certificate. So it's not that your options are limited. Just try to pick one that best suits your needs.
Decided what you want? Great, now click Choose keep going.
Step 3: Register your domain name
As mentioned earlier, Bluehost also offers you a free domain for the first year.
Bluehost prompts you to set up your domain by first entering a potential domain name and checking for its availability. Make sure you look for .com versions as it will make your website look more professional and trustworthy.
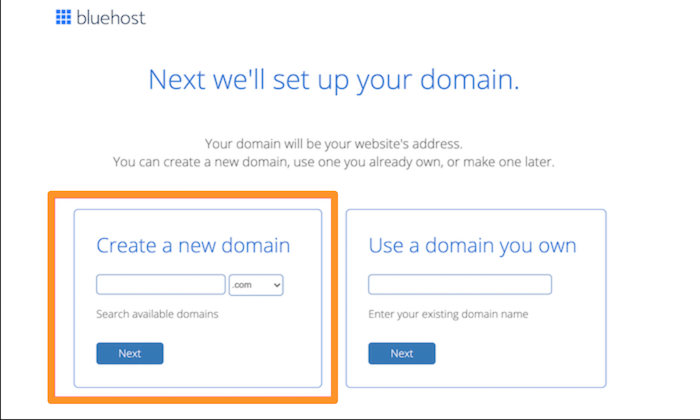
If you already have a domain from another location, you can enter it in the second field to use a domain you own.
If you don't have any domain name ideas at this point, don't worry! You can skip this step and create your domain later.
Step 4: Enter your account information
Next, you need to sign up for a Bluehost account. You need to fill in some basic details about yourself or your company. This includes the following:
- First name
- Surname, surname
- Company name
- address
- Phone number
- Email-address
The whole process is pretty straightforward and will be completed in a matter of minutes.
Step 5: Select your plan terms and complete your payment details
I recommend signing up for the 36 month plan for the best deal. This may seem like a huge commitment at first, but believe me, it's worth it. Why not make the best possible deal when it is available?
If 36 months is too much commitment, you can always opt for the 24-month or 12-month plans.
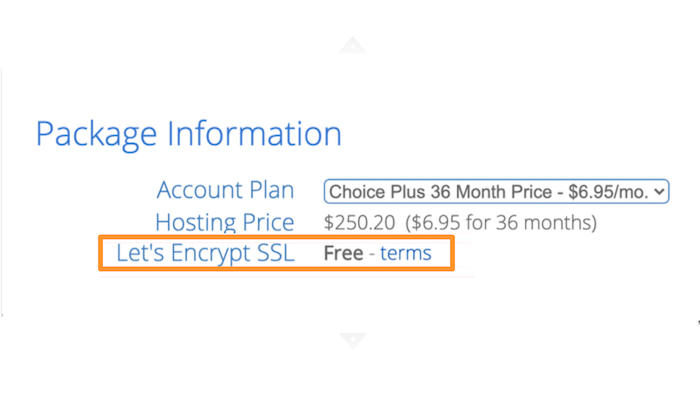
Under "Package Information" you will see the Let's encrypt SSL is automatically added to your package without you having to check or check a box.
There are several other upsells that Bluehost will show you, such as SEO tools and SiteLock Security. Although you can skip the SEO bit, for better security, I recommend SiteLock as it includes malware detection, automatic malware removal, weekly scan reports, and file-level scanning.
You will need it later, so it makes sense to include it in your plan now.
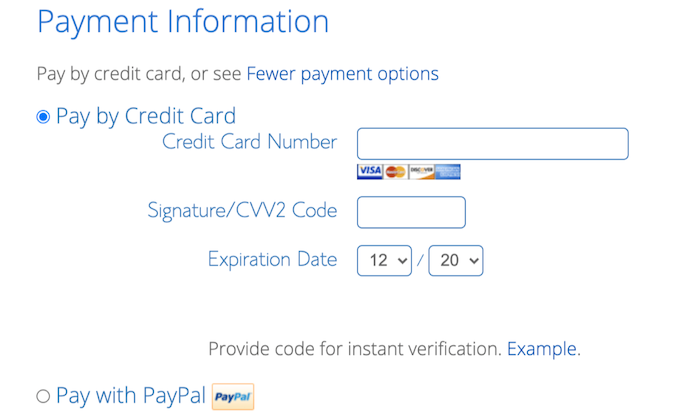
Finally, all you have to do is make the payment.
Enter your credit card details or pay directly via PayPal – the choice is yours. Your plan will auto-renew, but you won't get low onboarding rates after your first term.
Step 6: Activate your SSL certificate
In general, your SSL certificate is automatically assigned to your website and installs on all domains in your account. But there may also be cases where you have to activate the SSL certificate manually.
For this reason, it is better to check if your SSL has been enabled or not. In addition, you can do this right from your Bluehost control panel.
Here's what you need to do:
- Click on My sites in the left menu of your dashboard.
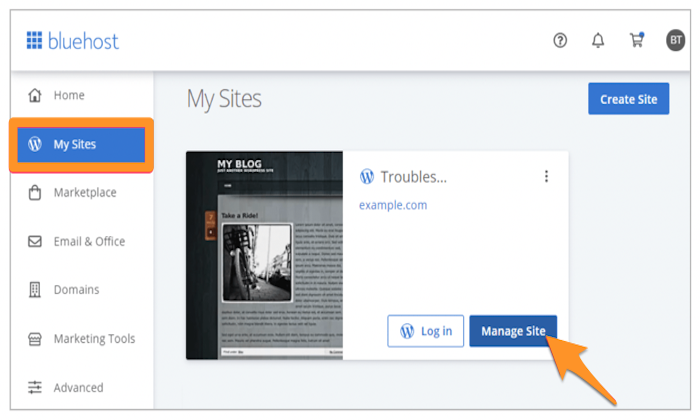
- Select the website whose SSL you want to enable, and then select the one Manage site Button.
- Then go to security Menu tab at the top of the screen.
- In the Security Certificate field, look for Free SSL Certificate Section.
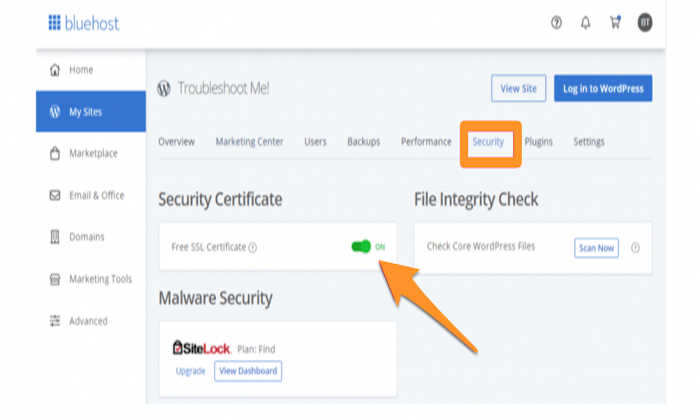
If you find that toggling the certificate is enabled (the toggle is a green color as in the screenshot), you don't need to do anything. If not, click On Position to activate it.
After you have activated the SSL settings, it will take a few hours for the certificate to install itself and fully activate itself.
During this time, you should keep an eye on your email in case Bluehost wants you to take any action to continue the activation process.
Voila! You have now activated an SSL certificate and are ready.
Conclusion
Hope you enjoyed this guide on how to get an SSL certificate and it is helpful.
Don't wait any longer if you don't have an SSL certificate. Hackers are always around the corner and thinking that your website will stay secure is just wishful thinking.
Would you like options other than Bluehost?
You can opt for other reputable web hosting providers like HostGator, WPEngine, Dreamhost, and InMotion. For a more in-depth analysis of each option, visit our best guide to web hosting providers.
Which web hosting provider do you prefer for an SSL certificate? Tell me all about it!