Tips on how to construct your first web site like a professional
Disclosure: This content is endorsed by the reader. So if you click on some of our links we may receive a commission.
You have decided to create your first website – great! I'm going to teach you how to set up your website just like you have done a thousand times already.
What you should know about starting a website
To get your website online you need one Domain name and a Web host.
- ONE Domain name This is where people access your website. For QuickSprout this would be www.quicksprout.com (also known as URL, the technical component of a domain name).
- ONE Web host is a company that you pay to hold all of your important website data.
Bluehost allows you to buy and register both a domain name and a hosting plan.
What if i want a free website?
You can start for free at WordPress.com.
There is no need to register a domain name or choose a web hosting provider to take advantage of the free plan as your website is automatically generated as a subdomain of WordPress.com. For example, if you want to start a blog about vintage teacups, your URL might be www.vintageteacups.wordpress.com.
If you're into this for the long term, keep in mind that if you own your domain name (i.e. www.vintageteacups.com) your audience is much more likely to trust your brand. Investing in domain registration and hosting is the first step in growing an independent business.
A step-by-step guide to building your first website
Ready to start? These 8 steps will seamlessly walk you through the process from signing up to creating content for beginners so you don't have to worry about leaving anything out.
Step 1: consider your website goals
Do you intend your website to be a portfolio of your work? A niche blog? An ecommerce website? You can do all of this and more through WordPress, which opens up the world wide web of possibilities with its full featured CMS.
How would you like to be known to your audience? This is your company name.
And how should they reach you? This is your domain name.
Since your domain name will be an important face of your business, this is something you should give some thought to.
A strong domain name serves your business goals by referencing your product or service. It should be catchy, memorable, and easy to type. If possible, try shorter names rather than longer ones.
How can you find the right name?
Let's take the two companies we work with in this guide as an example.
WordPress is short, iconic, and evokes images of text ("Word") and possibly a printing press ("Press"). It is clear that their business model is based on content sharing.
Similarly, Bluehost includes the word "host", which suggests it is a web host provider. The combination of "blue" and "host" is easy and intuitive.
Both names are very brandable and easy to remember.
Step 2: choose your Bluehost plan
The advantage of hosting on Bluehost, and not just WordPress.com, is that Bluehost takes care of the security, speed, performance and updates of your website for you.
We recommend shared WordPress hostingThis gives you access to a server that is specially tailored to the WordPress software package. This means that security and speed are built in – in other words, managed for you.
To choose a plan, head to the Bluehost pricing page. You will see:
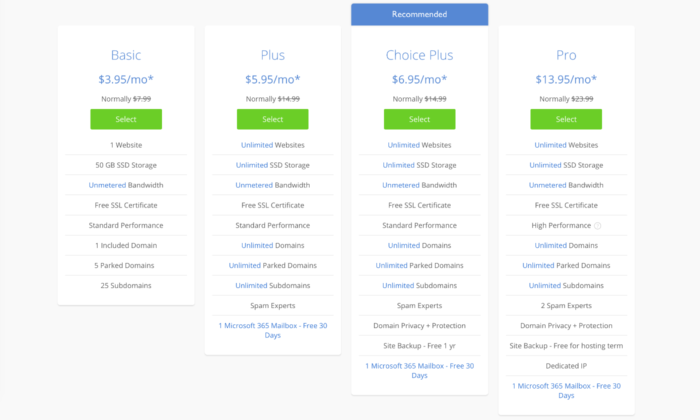
Bluehost offers four hosting plans: Basic, Plus, Choice Plus, and Pro. At each level, the plans come with a free SSL certificate (which adds an extra layer of security to your site), unlimited bandwidth, and plenty of storage. The hosting performance is more than good enough for most websites.
Pick the plan and it fits your budget. You can always upgrade later.
Step 3: Register your domain name
After choosing a plan, you will be asked to register your domain name.
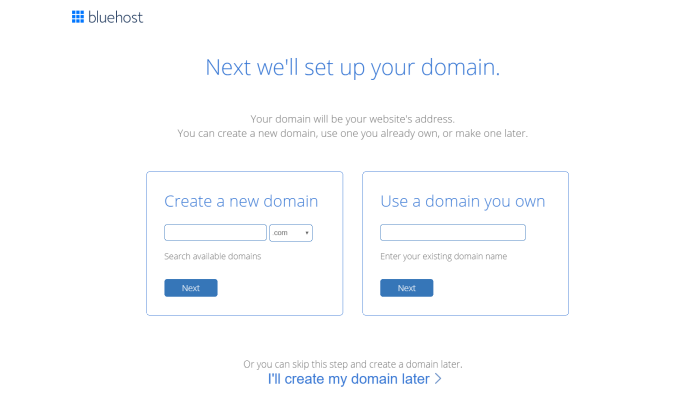
If you already have a domain name, enter it on the right. You may need to change your DNS records to make sure your domain name servers are pointing to Bluehost so that users can access your website.
When you register your domain name with Bluehost, enter it on the left. Domain registration is free for one year with a managed WordPress hosting account. Always note when your domain needs to be renewed so that it does not expire without your notification and your website is no longer accessible.
You will be asked to enter your personal information before completing your purchase.
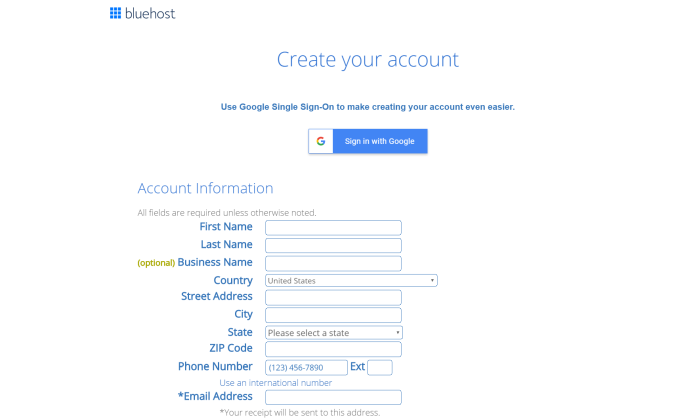
Make sure you choose a strong password for your Bluehost account (preferably not the same one you use to log into another site). You can then install WordPress.
Step 4: Install WordPress with one click
Connecting Bluehost to WordPress is incredibly easy. In your Bluehost account control panel, navigate to "MOJO Marketplace" and select "One-Click Installations".
This will take you to the Scripts and Platforms page. After you click on the WordPress icon located at the top of the page under "Blogs", an installation window will open. Click "Start" to begin the installation.
- Select the domain name in your account that you want to install into.
- Under "Check Domain", make sure that your domain name points to your account. This is especially important if you bought your domain name before signing up with Bluehost. If you get a warning that you are about to overwrite files, it's safe to check the box. Since this is your first website, there is no need to overwrite anything.
- Under "Show advanced options" you can select your WordPress username along with a secure password or log in if you already have a WordPress account. Enable "Automatically create a new database for this installation".
- Read the terms and conditions and check the box.
- Almost there! Click Install Now".
You will now be redirected to the progress page. When the installation is complete, you will see your Site URL, Administrator Login URL, Username, and Password. Print out this master list and keep it in a safe place.
Time to log into WordPress! Log in to your admin url and you will be in the dashboard where you can start visually designing your website.
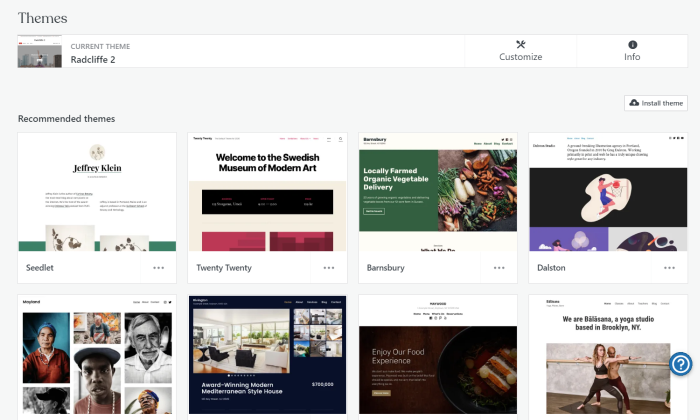
Step 5: try some themes for size
Your website theme is also known as "skins" and is like an outfit for your website. The theme you choose will affect your website's graphics, content layout, and some of the customizable design features that you have access to.
WordPress offers a number of free and premium (paid) themes.
When choosing a topic, pay particular attention to:
- Good design: is the design clean and organized? Is it responding to optimizing for about 50% of the people who prefer mobile viewing? How easy is it to navigate?
- Compatibility: Is the theme compatible with the latest version of WordPress and popular plugins?
- Backend: Is there an active development in the design? How easy is it to access support and documentation?
For most topics, you can try a live demo to see what it will look like and compare its appearance to your design and content goals for the website.
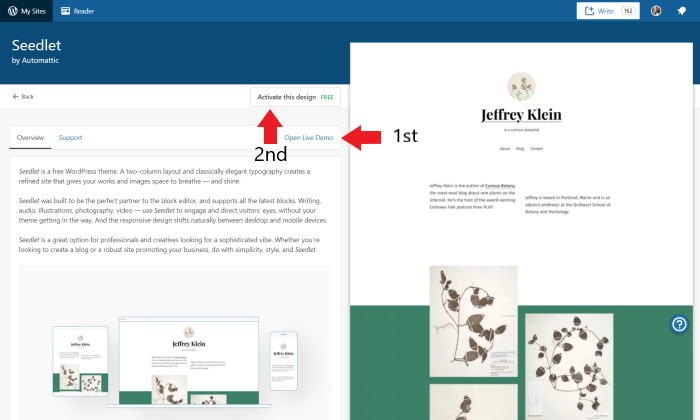
When you're done, click "Activate Theme" to install. You can always add plugins for additional features or switch themes if you are more used to WordPress.
Step 6: add some helpful plugins
If your website theme looks like a "skin" or outfit that adds substance, design, and shape to the website, your plugins are the accessories that hold the outfit together.
Plugins work together with your topic and offer desirable functions such as a comment filter, a contact form or an SEO toolbox (Search Engine Optimization). They work seamlessly with WordPress' back-end operations. While some are best for a specific type of website such as ecommerce or blog, many are universal. Plugins can be free or paid.
In most cases, you'll need a WordPress business plan or higher to use plugins. Aspects of Jetpack and Akismet (see below) are included on your blog.
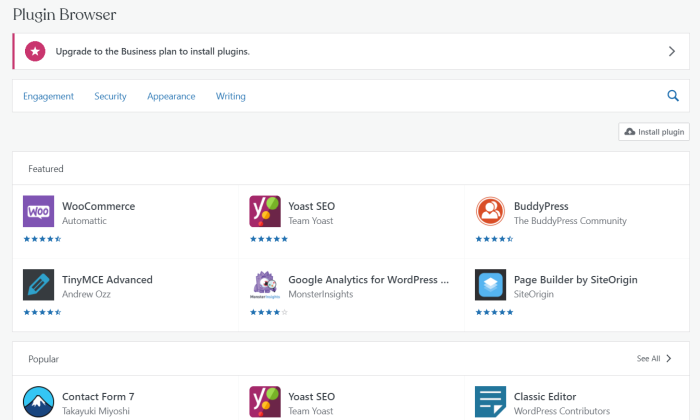
Popular plugins:
- Jetpack: This built-in plugin improves the security, performance, marketing and design capacity of your website. Website speed, image serving, and SEO are just a few things it can help you with.
- Akismet: A "spam battle service" that protects your posts, trackbacks and messages from spam.
- All-in-one SEO package or Yoast SEO: These SEO plugins will help you optimize your website so that it is found organically in search results when people search for similar products, services or content.
- WP Forms or Ninja Forms: With either of these plugins, you can create professional-quality contact forms in minutes without any programming experience.
Be sure to double-check your plugins before you install: a variety of positive user reviews, along with information about the developer, features, and latest release date can help you make the best decisions about your website.
Step 7: start creating your website content
In WordPress, there are two key differences in how the content of your website is organized: pages and Contributions.
- pages form the main framework of your website and are generally displayed in the navigation bar for easy access. There are a number of important pages that you might want to add including your home page, about page, and contact page.
- Contributions are individual pieces of content, each with a unique URL, that make up a blog. Many people choose to make their blog a central theme of their website, but you don't have to. Many companies keep blogs as a tool in their content marketing toolbox, and WordPress allows them to be assigned as a secondary page (see step 8).
When you start adding content to your website, it can be helpful to take inspiration from existing websites, both websites that you spend a lot of time on and websites that serve a similar purpose as yours. Ask yourself:
- How is the content of these websites organized?
- What are the main pages?
- How prominent is the blog?
- Does the site contain sub-pages and what are they?
- Where is the contact form?
- How do they use media to create an engaging experience?
How to create your first page (ideally the homepage):
After creating the essential pages, consider the functionality of your website from the point of view of your future website visitors. Although this might be difficult to put yourself into at the beginning, the content of a successful website is focused on the audience. Ask yourself:
- What do my visitors want to do on my website? What will be less useful to them?
- How can I structure my pages, content and media to achieve a positive user experience (UX)?
- How can I set up site navigation so that important information and features are easy to find?
- What information do my visitors need to understand my offer?
- What information do my visitors need in order to trust me?
Don't feel compelled to include all sorts of content at once. less is often more for a new website. Your website will likely change over time based on your evolving business model as well as the needs of your target audience. You can add more content at any time.
Additional pages
One of the beauty of website building is that your website design is entirely up to you. However, depending on the purpose of your website, you may be required by law to include certain content, such as:
- Contact details
- Handling cookies
- Ecommerce: Terms of Use, Refund Policy, Privacy Policy
Be sure to check the relevant laws in your area and update your website regularly.
Step 8: finalize your homepage and navigation
Would you like your homepage to appear as a traditional homepage or a blog?
WordPress lets you choose if you want one static (immutable) or dynamic Homepage (shows your ten most recent blogs). The dynamic version is the default.
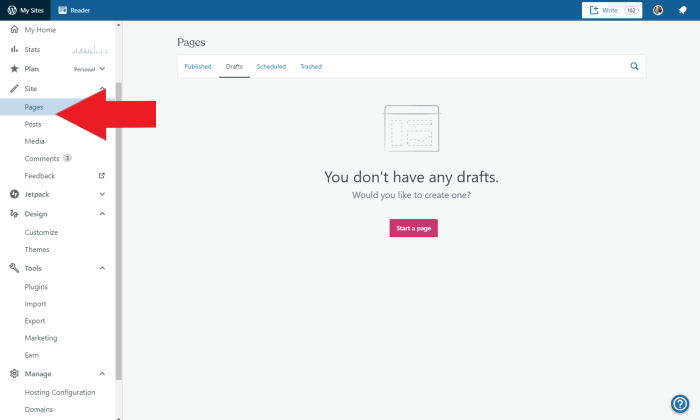
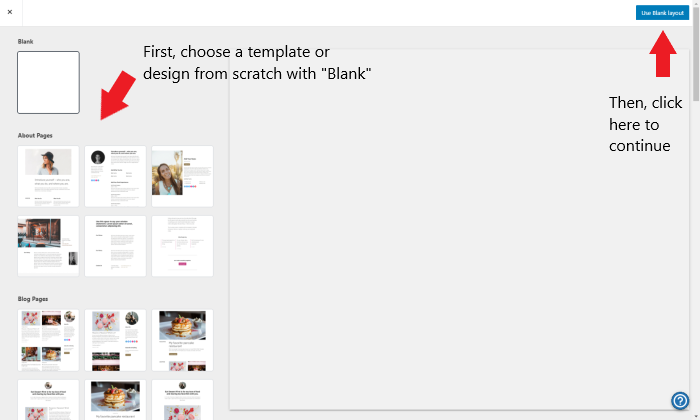
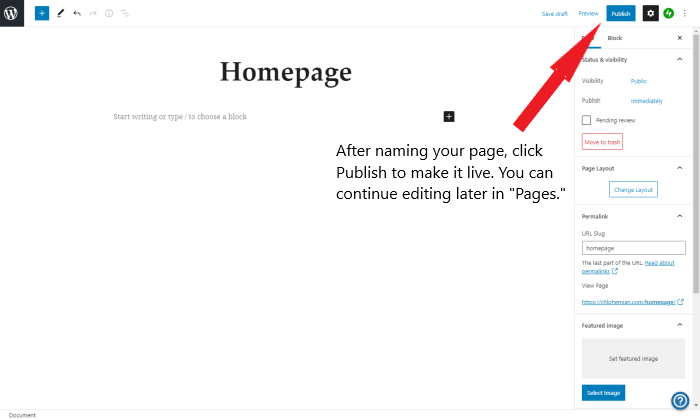
To designate a static homepage, find the Site category in the left sidebar, click Pages, then click Add New Page. You can choose a pre-made layout or click "Use Blank Layout" as in the photo above. Then name your page and click "Publish". For example:
Now navigate to the "Design" category in the left sidebar of your dashboard and click on "Customize".
There are plenty of things to play around with here, including adding your site title, tagline and icon, adding a header or footer, and changing site colors. First click on "Homepage Settings" and toggle the option "A Static Page" toggle. Below that you can select the page you just created.
It's time to add content to your homepage!
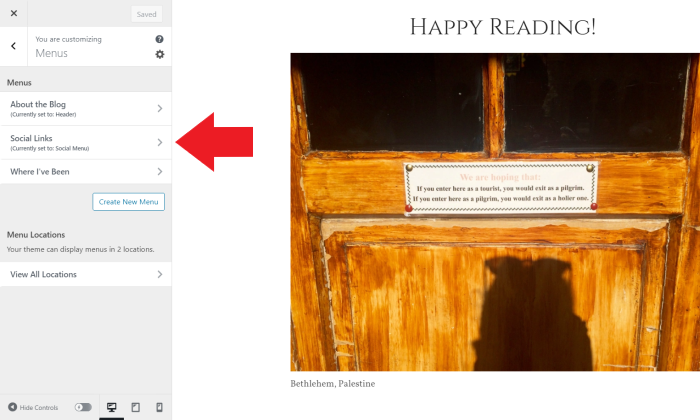
As soon as you add other pages like "About" or "Contact", these will appear as part of a navigation bar determined by your topic. Under Customize, click Menus to change the page order and location.
What's next?
You have just created your first website. Congratulations on this exciting new step!
Now you can familiarize yourself with the WordPress interface. When creating pages and posts, you use the block editor which uses Gutenberg blocks to add content and make your website engaging and interactive.
Since your website is a representation of your brand, I recommend creating your content with a critical eye. At the same time, learning over time is part of the experience. You can delete or click the Back button at any time. No change is permanent. So just play around.